Wednesday, 3 September 2014

A Galaxy In Flames Tutorial: Secret Weapon Bases- Wetlands

G'day folks, Macca here, and today I bring you a new tutorial type: Secret Weapon Bases. The idea behind this tutorial is to show those of you who are curious how to paint a variety of different bases, in this case in pre-cast resin.

To start with, I picked one of my favourites, wetlands. There is nothing new and groundbreaking to see here about painting wetlands, but that's not the point, the point it how I can show you some basic ways to get these effects.

The Prep.

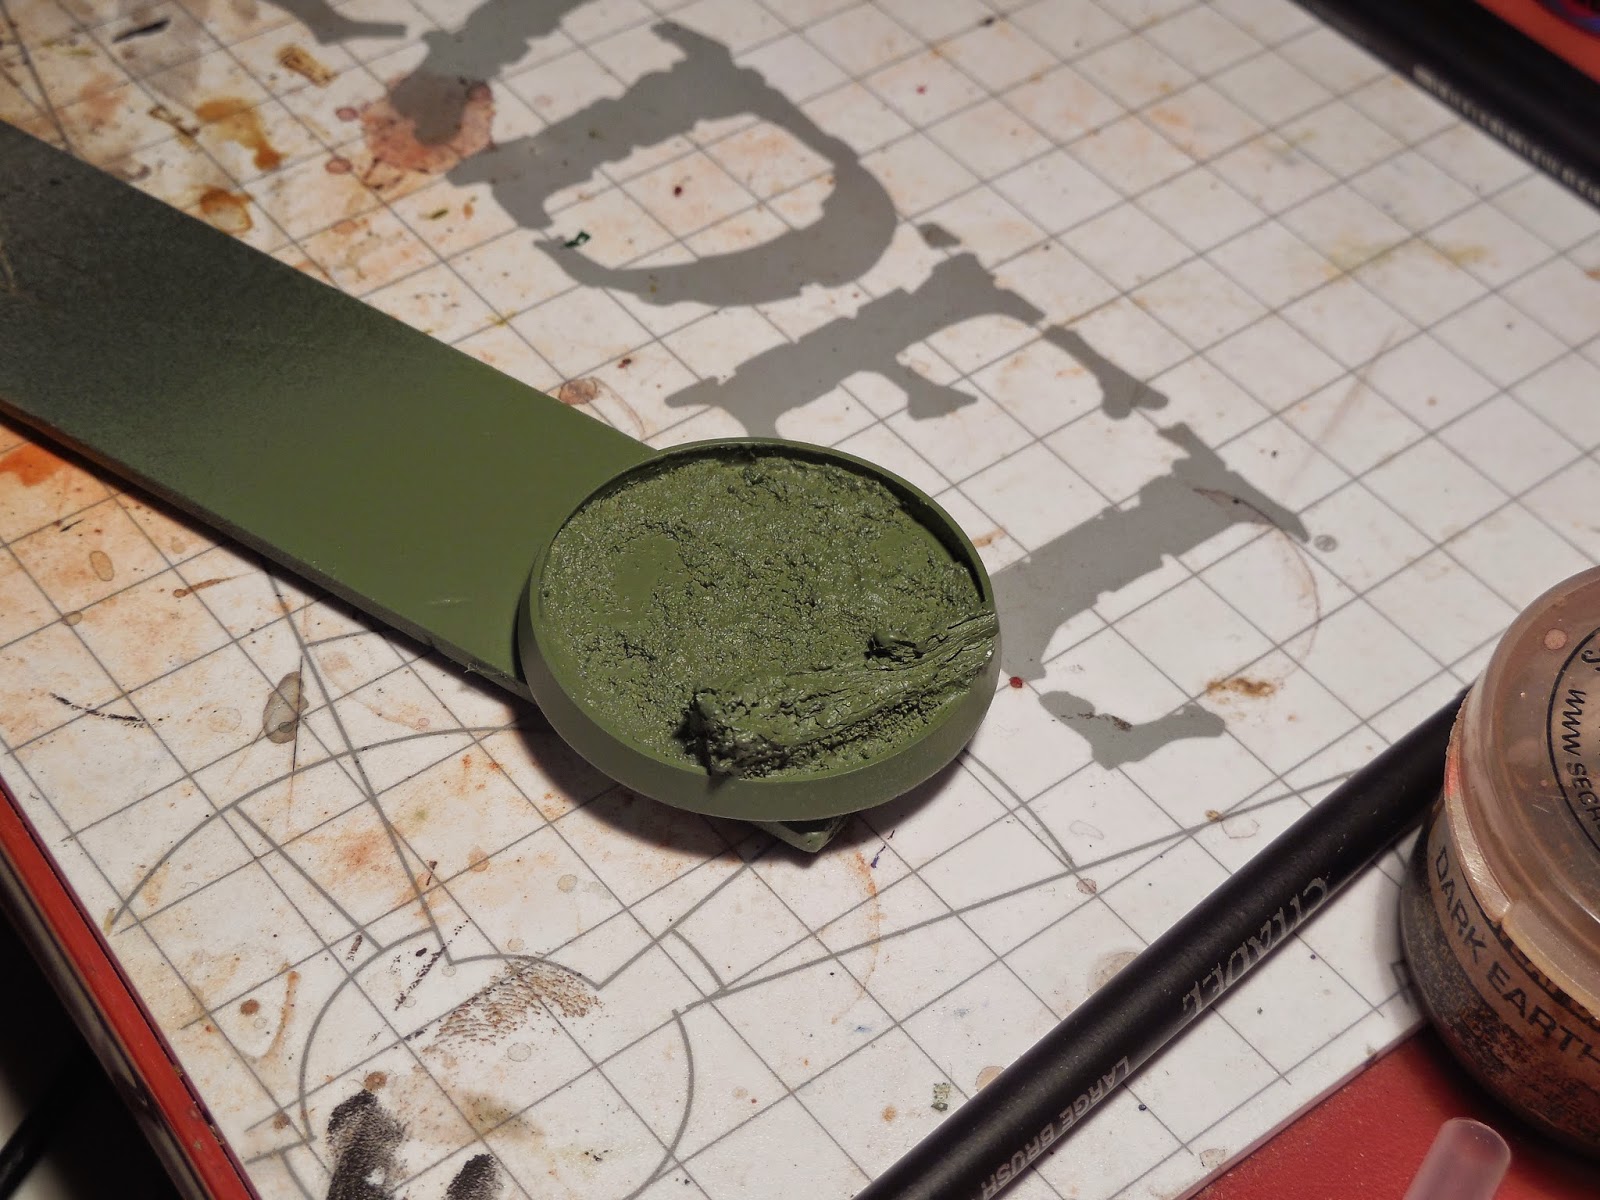
I started by gently sanding the mold overflow off the base edges, and then I washed the bases and gave them a quick undercoat with some Tamiya Light Grey primer. The idea is to just get some spray on, not to coat the entire base, as if you do so, then your base will be smooth and paint won't adhere as well. By misting on the spray, you create tiny variations in the surface texture, which will provide increased surface area, and thus, more for the paint to stick to.


Next, I lightly coated the base in an Army Painter green spray. This is the base coat I will use, as I want a nice swampy wetland. As I have several bases on the go, the one to look at here is on the left ;)

The Paint Scheme.

Next, I applied some Games Workshop 'Nurgles Rot' technical paint in the lowest areas of the base. This is to represent a sort of algae growing on the base. From there, I did a small black line around the edge of the base, and painted the log in GW 'Steel Legion Drab' base paint.


I now mixed GW 'Nurgling Green' layer with the 'Steel Legion Drab', and simply drybrushed the Log and the base in the areas where there was no algae.


The Scenics.

I now get out my bits of terrain and scenics from my little basing box of goodness. This box contains bark, twigs, sand, flock, resin, etched brass etc, and I find it a great little thing to keep around. Now, in this case, I'm using some fine twigs, from Hornby, as well as the wetlands basing kit from Secret Weapon, the sames guys who provided these bases.


First, I gather some of the twigs, and roll them together into a small bundle. From there, I cut the end off flat, dip it into some craft glue, and 'roll' the twigs between my fingers in order to help set the craft glue and keep a tight bundle.


Next, I end up with this. I decided that some smaller bundles would work better, so I simply cut this bundle in half. I then cut it down in length, providing me with a pair of 1/2 inch (about 12mm) lengths. I then gently trimmed the shrubs so that they are more ragged, as flat-top shrubs aren't true to nature, and thus look wrong to the eye.


From here, I again, dip the end into some craft glue, and apply the shrub to the base.


Now that I have my bushes in place, I apply a little super glue around some sections of the log, and place some of the foam shrubs around the log and shrubs.


I also took this opportunity to cut down the shrub on the left slightly, as I felt they were too identical.
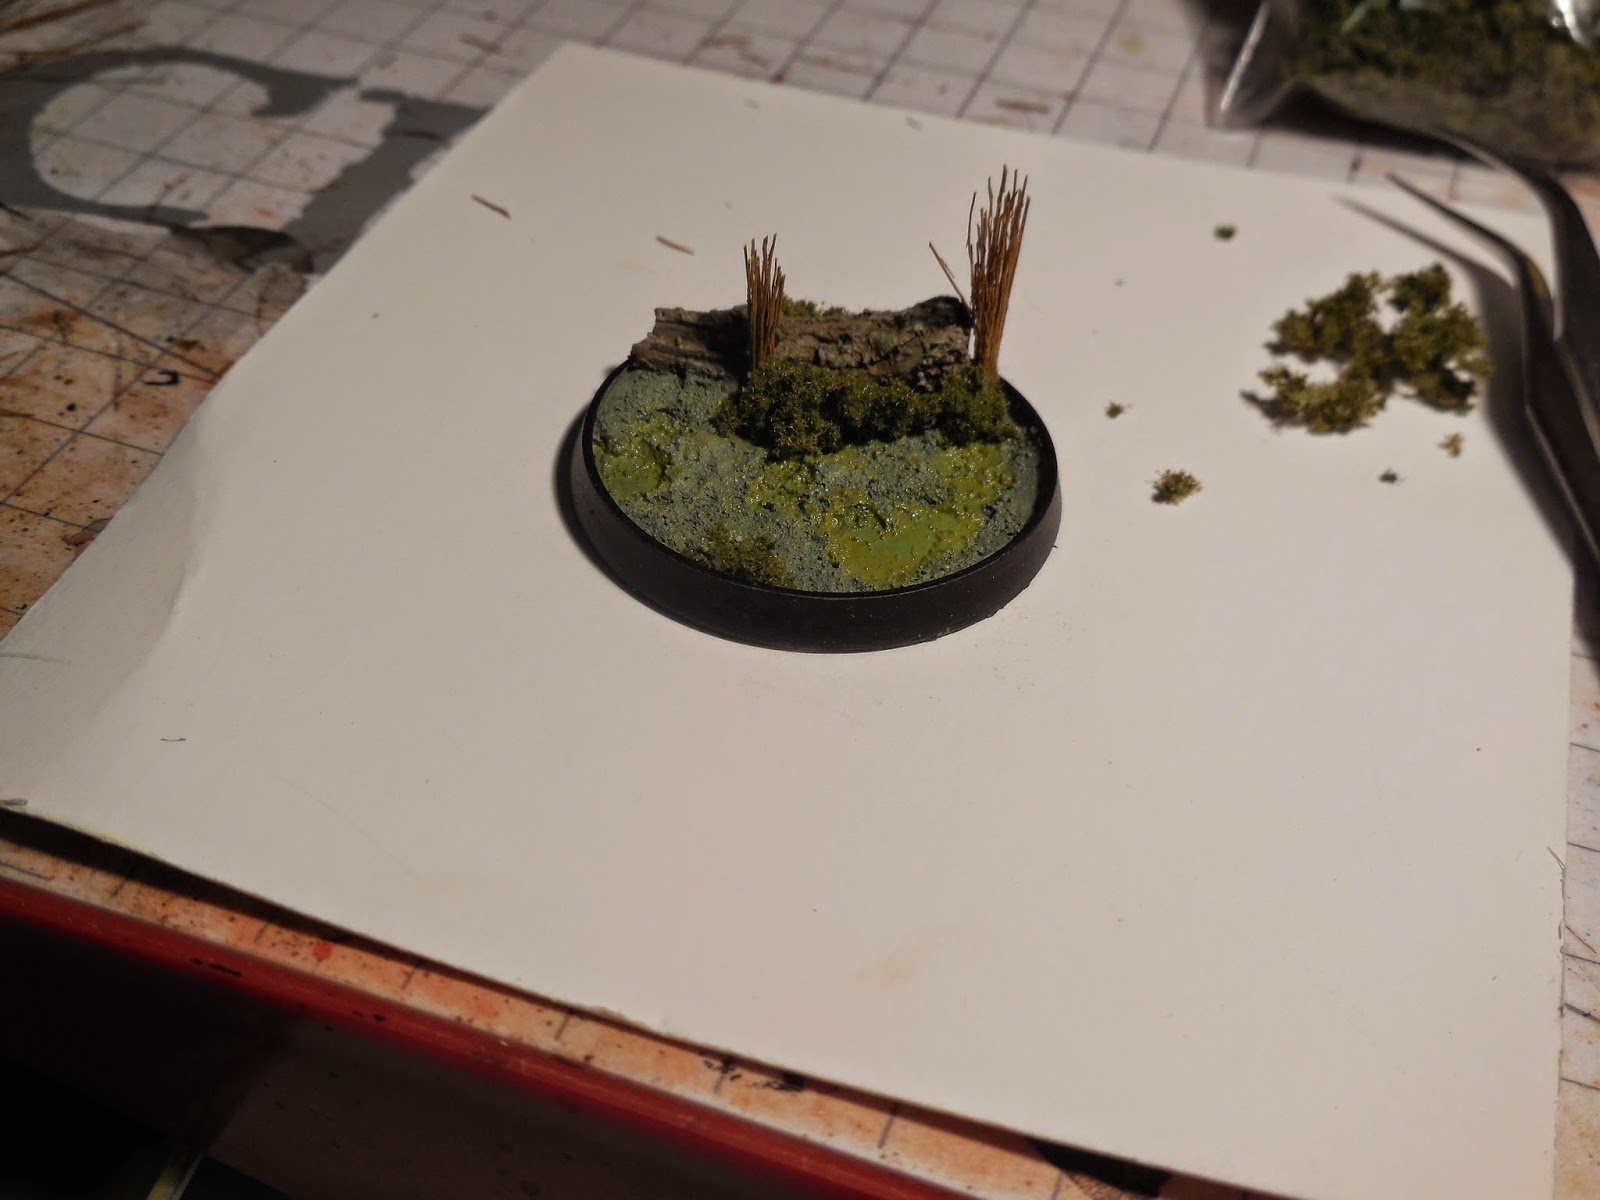

After applying some more foam, this was the end result.


The Water.

Out comes my Secret Weapon 'Realistic Water'. This stuff is so superior to Games Workshop wet effects that it's not funny. It flows like water too, so it's easy to coat the base. The down side is, that you can only apply it in thin layers, and as it sets it will shrink slightly, so you will have to do multiple layers to finish a base. If you're doing large-volume work, I suggest using a clear resin.


There is nothing hard about this stage, you just apply the 'water' in little beads from the dropper bottle, and keep a toothpick handy to pop any air bubbles. The result is nice and simple:


Result:

Once dried, this is the end result:


I love the algae look in the bottom of the base, I think this would look great with some Heresy-era Death Guard strolling through it.

So there you have it, Secret Weapon Bases- Wetlands. This is the first in a 9-part series I have planned, so if you like the article and would like to see the rest of the series, let me know,

Macca

Tuesday, 2 September 2014

Ferrus Manus, The Gorgon: Part 2

So, Ferrus Manus. This one actually tried my patience. Basically, the flash, and the quality of the model was far worse then the other Primarchs I own meant that I was in a rotten mood the whole time. Anyway, in the end, here he is.


It's important to point out that the model is painted differently to my other Primarchs. Where Horus is a poster boy, Lorgar is standing in a ritual and Angron is charging into battle, this model is worn out. He is in the midst of the worst fighting on Istvaan V, and I tried to paint him to represent this. I tried to use a 'greasy' tone on his flesh, as if he has exerted himself and even his Primarch physiology is tired, so he's sweaty, and his skin is darker, not just tanned, but stained with dirt and sweat.


Anyhoo, that's Ferrus Manus, I hope you enjoy,

~Macca

Monday, 1 September 2014

Ferrus Manus, The Gorgon: Part 1

Hi. Nothing more interesting as an introduction, as this model has sapped my soul in construction. I spent nearly twice as long on this model as any other Primarch, and easily comparable time to a f#$ing Storm Eagle. Sigh, Forge World, I can live with the bad mold slip, but instructions go a long way.


Since Forge World didn't supply the kit with in instructions, I made my own. Simply read the sprue, cut the part you need, and glue them in in this way.


Ferrus' servo harness was designed by Satan, blessed by Hitler, bathed in the blood of virgins by Genghis Khan....  no, not really, I just had to do a lot of fine cutting with a scalpel due to the poor quality of the casting. Basically, the flash was at failcast levels, and it took me about an hour to finish off the harness assembly.

Ok, moving on to happier things, you glue the small bit of base that comes separate to the rest onto the edge of the releasable part of the base like so. From there, I drilled and included 3 2mm magnets into each half of the display base.


From here, I undercoated, base coated, and then used Tamiya Clear Blue to get a glossy blue finish on the black armour. I did this because black armour is boring, and I wanted to get an oily wet feel to it.


After about 3 hours of painting many many tiny metallic details, as well as doing the arms, I ended up here.


From here, I have to paint the base and the face of Ferrus, but you have seen numerous tutorials dealing with that of late, and as Ferrus' base is pretty simple, just sand and dead marines, I won't bore you with the details. Well, that's all for now, next time you see Ferrus, he will be complete!

~Macca

Saturday, 30 August 2014

And here marches the VIIth Legion....

Hi all,

I'd like to introduce myself as the newest crew member to the AGIF blog. My name is Andrew, but more commonly referred to as 'Spraggy". I met Keepy, along with many others, many years ago during one of my forays into the wargaming circle of the Australian Defense Forces. It wasn't long before he became a gaming nemesis to me and then a good friend shortly afterwards.

I have been playing various miniature wargames, including warhammer 40k since 1989. I initally entered into the 40k world with Imperial Fist space marines due to somehow always ending up with the yellow models when my friends and i played space crusade. My hobby branched into space hulk and my first miniature collections were of Imperial Fists Terminators. A friend soon offered me a game of 40k but i offered all i had was 30 odd Terminators. Even still he agreed and my little lumpy yellow dudes stormed over the table and i was soon hooked onto warhammer 40k.

Ever since then i have been an avid collector, painter, hobbyist and player. Seeing as how the shine of 40k is somewhat diminished these days, my interest has naturally turned to 30k and my loyalty to the VIIth Legion is strong, and after persistence from Keepy and Ty Casey from 'A Traitor's Hand' blog, i have now joined the ranks of Legion players.

The vision i have for my 30k force is that of a chapter of Imperial Fists dedicated to that quintessential role for them, The vanguard. I envision a strong block of about 30 breacher marines supported by various tactical, support and heavy marine squads. (i have a plasma support, rotor cannon support and las cannon heavy squad).


The chapters elite are a squad of terminators and a squad of templars. Furthur support comes in the way of rapier platforms, tarantula platforms, a Sicarian and Landraider for infantry support and a fire raptor and storm eagle for air support.


I'm hoping this overall looks like a phalanx of yellow ceramite advancing solidly and stoicly to close ground with the foe and grind them down.


I look forward to showing off my chapter as it grows and no doubt cheering about victories as i trash Keepie's Mechanicus Bullies and put Wadey's purple gay boys to the sword!


Saturday, 2 August 2014

Lorgar Aurelian: Part 3

So I finally finished Lorgar. With one big exception: his cloak. Upon starting to assemble the model, the cloak wouldn't even come close to fitting. Short of hacking away at it madly, I have decided to leave it off until I can figure out what to do. Anyway, I am very pleased overall, however I think I will slightly darken the area around Lorgar's eyes as they don't stand out enough for my tastes.


So three Primarchs (including the repainted Angron) in a week or so. Very pleased. Funny enough, Lorgar is the first Edgar Skomorowski (I think that's how you spell his name, apologies if I'm wrong Edgar!) Primarch I have worked on, and it was quite a bit different to Horus and Angron. His armour is more simplistic in regards to trim, but the textures are very organic, unlike Horus and Angron who are very smooth and mechanical sculpts by the great Simon Egan.


Smash face Warmaster, smash face.

~Macca