Tuesday, 21 January 2014

White Scars Spartan Assault Tank Part 2

Hello all!

Macca again, this time I'm here with part 2 of my spartan WIP for my White Scars. First off the bat, we have the left side of the tank. You can see here that the decal for the White Scars has been placed central on the door. It has then been varnished to keep it on the tank, then sponged gently with white, not too much, or else it will be too diluted. This gives it the appearance of damage and chipping. Note that the door frame is chipped all around, to do this well, you need to do the door separate to the rest of the tank, or else you will smear the paint and it won't look right.


This is the left side sponson shroud. Again, it has been chipped at, all with a sponge. The idea here is that only the edges of panels are chipped. People often make the mistake of chipping a flat surface, this isn't how it works in real life, and it doesn't look right. Do a web search for battle damage and you'll see how far some go. That's not to say don't do it if it suits you, just be mindful that it isn't realistic.


The right side is much the same, a little more damaged, for no other reason then to keep the tank from having too much symmetry. I have used a heavily diluted oil wash, again, my mix of green, brown and black, to create my 'grease', I have then gone and put it on every rivet and into most panel lines. This helps to define the shape of the tank, as well as breaking up the plain white. There is one really important point to note here, and that is DON'T WASH THE WHOLE TANK! This is again, something the internet is very bad for in tutorials and the like. Doing that will actually blend the wash into the panels, meaning all you're doing is making the whole tank darker, rather then creating contrast. Also, it leaves big dribble marks often.

So, this is where we are at. The next step in this build is the weapon systems and the tracks (gulp), tune in in the next day or so, and I will have that post up and ready. Catch.

Monday, 20 January 2014

White Scars Spartan Assault Tank Part 1

G'day all!

It's Macca here, with a slightly more in depth WIP, on my newest little edition, a Spartan Assault tank. So, with out any further commotion, lest get into it! The rear has very diluted hazard stripes. The reason is two-fold, wherever there is engine mesh, you don't want people slipping in, also, it looks bloody good!


 This is a full shot of the main hull, I have added Chaos Space Marine smoke launchers to either side of the hull, these are 'counts as' frag assault launchers. Frankly, I don't like the conversions people have been doing using the Land Raider Crusader ones, they strike me as too bulky, especially on White Scars who are all about speed. I have also added a small handle onto the top of the cupola and magnetised the top of the heavy bolter turret to allow the addition of a multi-melta (pic of that later.)

Here is the bolter turret and those launchers almost finished. The first stage oil wash has been applied to the recesses and bolt heads, with another one to go. The wash is a mix of brown, green and black, in order to give the bolts a suitably greasy look. The stripes on the hull and track sides are painted using templates I cut using a scalpel and Tamiya brand masking tape. I cut a series are triangles, then taped the cut outs to the hull. I then lightly airbrushed multiple layers of red softly onto the hull to avoid colour bleed under the tape. Once dried, I removed the tape, and lightly varnished over the top to prevent the red from being wiped off by my clumsy hands. I then lightly sponged and brushed white onto the red to make it appear as if it has been chipped away. The caution stripes on the rear were performed this same way, only changing out the colours.

Here we have the sides, with before and after the addition of weathering and damage, the look I have aimed for is ah that is caking the sides, I have also used a slightly off-white to allow it to seem less clean. Also pictured is the multi-melta I converted up for the kit. You may notice that the red stripes are asymmetrical. This is because White Scars mark their vehicles in a very different way to most Legiones, as they are very individual warriors, who adorn their gear in tribal warpaint.


That's all for now, please come back soon for the finished shots!

Sunday, 19 January 2014

Raven Guard Sicarian


 Hello, Macca again,

Today I have my Legion Sicarian. Once more, RAVEN GUARD! Ok, the joy of that aside, here is what I have done.


The turrets are all magnetic. The 30k era side sponsons are notoriously bad to put together and to still have move, yet not droop under their own weight, so I used 10mm magnets to hold on the assembly, and 3mm magnets to secure the sponsons themselves. This allows for removal for painting, and for gaming (if I want to take lascannons one day or heavy bolters) or vehicle damage such as weapon destroyed. I decided I wanted a commander for the tank, so I used Mr Mohawk from the FW vehicle commander range. He is also magnetised in, and the open cupola is magnetised, so neither of them snap off!


Finally, "Yeah mate, just chilling out in my tank."


Multiple angles of the beast. Note the really beaten up white stripe, being a tank is hard wear on the paint in real life, and this one is no exception. The dust around the treads and the sides is more red, as the tank is likely to chew into the ground, in this case tearing up clay, whereas most units in the army are weathered in khaki tones from surface dust.


That's all for now, pop back soon!


Ezekyle Abaddon - Finished

G'day Guys,


Keepy here with the final instalment for Ezekyle Abaddon!


As I was saying in the last post, this model came out far better than I was anticipating. From where we left off last time, the head, base and final details were all done completing the model. I will cover the bases in a later post as it was done in one massive batch with the Justaerin Terminators bases. A very light airbrush of GW Rotting Flesh was applied around the feet to give it a slightly dusty feel. The head was done with GW Elf Flesh and Washed with GW Ogryn Flesh, then layered back up with Dwarf and Elf Flesh. 


I took this model to the ADGWGA (Australian Defence Force War Gaming Association) Championships in Dec 13 and he ended up getting 1st place as my Single Figure painting comp entry! Not only did I win that, but got best painted army with my guard to boot! So great weekend on the hobby side of things cleaning up all the painting awards.

Now to finish the rest of an army to this standard...!

Cheers

Keepy

Justaerin / Cataphractii Bases WIP


Saturday, 18 January 2014

Ezekyle Abaddon WIP 2

Hello there!

Keepy here again, this time with Part Two of our Ezekyle Abaddon WIP progress. If you missed the first part you can find it here.

So the airbrush highlighting has been done, and Abaddon is ready for some detail. The chipping was done first - unfortunately I didn't get a pic of just that stage but you will see it in some detail in the next few photos. Chipping is done VERY sparsely around edges you think will see a bit of use, for example the front of boots, the cornices of the armour, forearm guards, and the leg grieves. The Abaddon model has battle damage modelled into it so make sure you pay attention to those areas as well. To do the chipping, grab a piece of sponge (like the ones that used to come in the back of blister packs will do great). Tear a corner off so you get a raggedy edge that is uneven - if you apply with a flat sponge you get a flat glop on your model. Then gently dab the corner you tore off into your paint. I prefer to thin my paint in water on a palate, as direct from the pot tends to dry quickly and leave big dollops of paint of your model. You then gently dab the sponge on the model over the previously mentioned surfaces.

Abaddon was done in two layers, one of straight GW Mechanicum Grey, and one of the old GW Fortress Grey. The Mechanicum Grey was done a lot heavier than the Fortress, as it blends well with what is now effectively grey armour. The two colours compliment each other and layer very easily. Like the airbrush highlighting - less is more. Don't go too overboard as it is the suttle details that will really make your model pop.

Next was the detail of the model. The red on the shoulder pads and knee was done prior to highlighting, and was done in a couple layers of the old GW Mechrite Red. The shoulder pads were then finished off with a thin coat of Tamiya Clear Red, not only does it give an awesome colour but also gives the illusion of depth as well. The black was left showing towards the edges to give the impression of shading. The gold was done in the old GW Shining Gold, which was done in 2-3 thinned layers, with the extreme edges highlighted sparingly with GW Runefang Steel. The rivets were done with GW Leadbelcher, and highlighted with Runefang Steel, as were the claws on the powerfist. The sword was done with straight Runefang, and all the cabling / metal components were done with Leadbelcher. The red pteruges (the leather looking straps hanging around the pauldrons and off the centre of the belt) started with a base of GW Evil Sunz Scarlet highlighted with GW Wild Rider Red.  The Eye of Horus (or 6?) all were done with about 5 layers starting with red working up to bright yellow highlights.


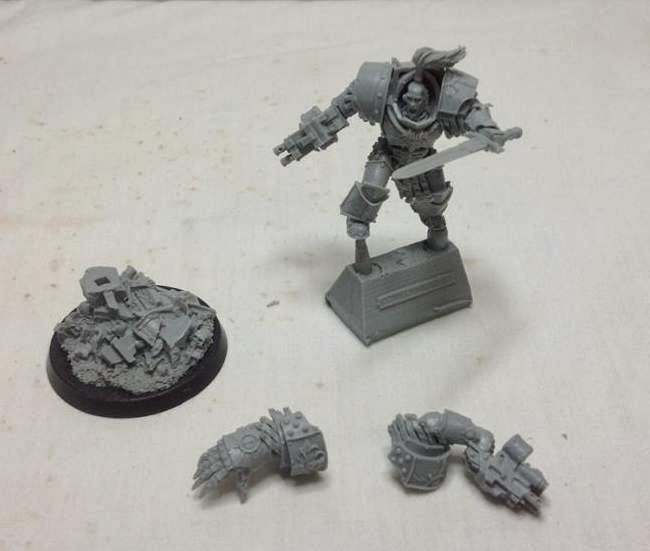
Starting to take shape now!

Once all your detail has been done it is time for the fun part - oil washes. Macca has briefly covered how to make an oil wash here. Before you apply your oil wash, you need to seal all that detail you have just put on and create a surface conducive to the application of oil. On a matte surface, oil wash will tend to soak into the model, and act like an acrylic shade. But on a gloss / semi-gloss surface, it tries to find the recesses and does not really stick to flat surfaces. I has a capillary like action where if you dab a bit of a loaded brush it will follow all the seams for you. So after mixing up a black oil wash, it was applied to all the seams and rivets, taking care not to get it on flat surfaces. This is NOT an all over wash, you have to take your time - and believe me it is worth it. Because the model is effectively a dark grey from the airbrush overspray from highlighting, a black wash actually pops on black armour. Check Abaddon out with a black wash!


Really makes the detail pop, doesn't it? Well worth your efforts to stay nice and neat. The benefits to oils vs acrylic washes are great too. With acrylic, once it is on, it is on. There is no being able to take it off the model. With oil, if I get a cotton bud / ear cleaner (or cue tip) with a bit of artist's turps (sort of like mineral turpentine but without the bad smell) and give the area a gentle wipe, and hey presto, mistake gone. Here is a shot from the back:


You can also see the chipping on the back of the grieves a bit better from this shot. The Cthonian markings were done with a  white oil wash and after leaving him 24hrs to dry (this is to make sure he is absolutely dry or the clear coat will react to the oil and not set) give your model a couple coats of flat clear. I use Testors Dullcote but Tamiya Clear Flat works just as well. This takes the glossy sheen off the model and also sets on your oil, chipping and painting so far.

Well that will do for this post, on the next instalment we shall have a look at the finished product, and let me assure you this turned out a lot better than I expected!

Till next time

Keepy

Abaddon Finished

Raven Guard Jump Pack Commander

Hello hello, Macca here, one of the three Prime Evils who works on this blog,

First up, I'm going to start with my Raven Guard. I spent a solid couple of weeks working on these guys, experimenting with a few new techniques. Overall, I am very happy with how they came out, but I will let you decide.


 This guy is a jump pack commander. I built him before Forge World released their MK II and III power weapon kits, so in order to get suitable lightning claws, I cut and filed a set of Warp Talons. This took a while as their was a lot of trim to remove. Once the trim was removed, I thought it would look great to add some rivets to the claws, just to add to that heresy era vibe. The rivets are just small pieces of round plasticard, and they were attached VERY carefully with poly cement.


 The main body is off an Emperors Children Palantine Blade, as I love the pose, it also provides a very characterful looking set of armour, which combined with the dynamism gives you a really 'come at me bro' look.


 At this stage the model has been painted, and hit all over with a gloss varnish. The reason this is done is so that the washes I add to it sink into the crevasses in the model. I use No.1 medium mixed with the oils, at about a 15:1 medium to oil ratio. The models throughout the Raven Guard are painted grey, the black oil is used to add depth to the grey (view the post on Abaddon for how the grey was done here ), as plain black is too boring. If you use No.1 medium, you will need to wait at least 8 hours between applying it and varnishing over the top. If you use No.2 medium (a slower drying medium) prepare to wait between 24 and 36 hours.


With decals applied. It is very important when you play with decals to thin them and seal them correctly. I am not going to go through the process right now, but keep an eye out for a future blog...


Ezekyle Abaddon WIP 1

The Forgeworld Abaddon from the Horus Heresy era has been a model I have wanted to do for a long time. Ever since Forgeworld started the Horus Heresy series, their model quality has gone up quite substantially, in particular the mold lines that you used to get. This model (along with Garviel Loken) really have raised the bar, and you can tell that they have been sculpted with a lot of love by Simon Egan. What better way to start my 30k army than with the Warmaster's right hand man!

Because of the good cast, there wasn't too much clean up to do. A little trimming with the hobby knife was all to be honest! I left Abaddon on the casting block as this would make it easier to handle him during the paint process without rubbing or wearing the paint off.

I magnetised his arms as he has two weapons options - the power sword which is featured in most of the artwork for Abaddon; and a combi-bolter with an underslung grenade pack. I also crafted a combi-bolter arm to replace his powerfist in the event I wanted to run an all terminator army in 40k. With a power sword and storm bolter look-a-like Abaddon substitutes well as a Belial stand in for a Dark Angels army.... I have since abandoned that idea and have now opted to go with a full 30k load out as opposed to one that ticks both the 30k and 40k boxes.


Abaddon with powerfist and powersword. The head is not glued on and is sitting to pose for the photo.


Abaddon with all weapon options and base, fitted with the makeshift combi-bolter right arm for 40k use.


Undercoats were done with a combination of GW Chaos Black (I know, I know...) and Vallejo Model Air Black Primer.  Painting was done with the model in parts glued to tooth picks as you can see in the back ground. The superglue I was using was a pain in the arse and wouldn't set in under 15 seconds, even then it only formed a weak bond. Accelerant is a must for the next project! The toothpicks are stuck into some refrigerant grade foam (it doesn't melt when you hit it with spray cans) so spraying with the airbrush or spray cans is easier. Also pictured is a libby conversion I did to go with Abaddon and his retinue of Justaerin Terminators, I will cover more on him in a later post.

Once the basics had been done, it was on to highlighting the black. This was a bit daunting at first, but with a bit of help from old mate google I had found a few varying techniques and made my own mash of them to suit. I went and got an adjustable pressure valve from Supercheap (a car parts shop in Aus) so I could dial the airbrush right down and get only the minimum amount of spray required. The first layer was done with a mix of Mechanicum Grey / Abaddon Black (lol) in a 1:3 ratio. This was then thinned with Tamiya X20A acrylic thinners then applied to a test model along the general areas of wear and along the edges of the armour plating. You sort of have to let go of the "traditional" way of painting if you haven't done this before and just have a crack at it. The 2nd layer was done with Mechanicum Grey / Abaddon Black again but in a lighter 1:2 ratio. That was as light as I wanted to go as this model was all about the small details and over highlighting it would bring all my work unstuck.


Undercoated model on the left, test model for highlighting with the airbrush on the right.


After doing a couple of the Justaerin Terminators as test models, it was onto Abaddon, who went really well. I am really happy with the way my first lot of airbrush highlight went, and I think it will be the chosen technique for all my 30k models from now on. A couple lessons learnt - less is more. Don't go overboard with excessive highlighting as this will in my opinion detract from the overall look of the model. Thin your highlighting paints more than normal - it makes for a smoother transition between colours and the airbrush will apply it more easily.

That's all for now, in the next post I will cover battle damage, oil washes and detailing. If you have any questions, please don't be afraid ask!

Cheers

Keepy

Abaddon WIP 2