Showing posts with label Sons of Horus. Show all posts

Saturday, 30 March 2019

Marauder Blackshields Pt I

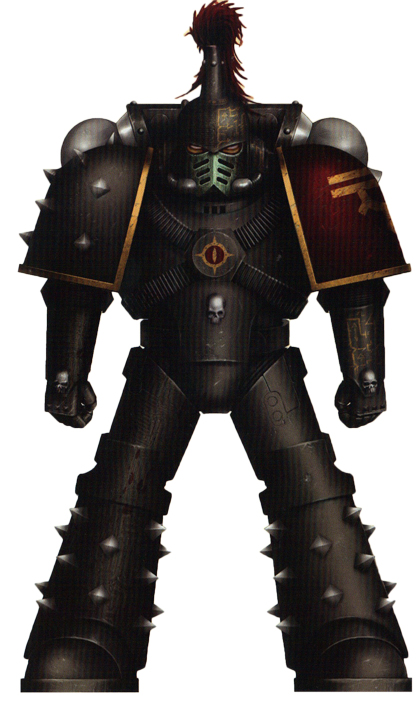
Honour and pride. Honour and pride had filled Artuas' heart the day he had been selected from the mass of noviates stationed in the training camps on Terra, to be elevated to full Astartes. Honour and pride at being chosen to take part in the Great Crusade to bring all the lost worlds of humanity back under the Emperors fold, whilst wearing the colours of the famed Luna Wolves. And when Artuas thought his hearts could not be any more full of pride, the day came when he, and all his Terran brothers were reunited with their genetic father, the primarch Horus Lupercal. 
Not long after, the legion was renamed The Sons of Horus and an influx of cthonian recruits swelled the legions ranks. Victory upon victory was had by the legion until the greatest victory of them all happened. 
Ullanor was finally secured and by the hand of Lupercal and his legion. Artuas could not be any more honoured by the achievements of his primarch and legion as Horus was named Warmaster and give command of the Emperors armies.
Brother Artuas
It wasn't until many years later that Artuas began to notice a change within his beloved legion. A distinct cultural rift could be felt widening between the cthonian and terran legionnaires, which became more pronounced after an operation in the Davin system. The terran brothers were getting less and less and a sense of exclusion was beginning to feel pronounced. Artuas put aside his concerns as petty though, as the great crusade was at its zenith and overshadowed anything so trivial.
Though trivial matters became more of a concern in later years as Artuas noticed the rise of warrior lodges within the legion. He couldn't quite place his finger on it, but a sense of wrongness seemed to hide just under ordered and calm exterior of the legion. Legion practices and protocols were changing ever so subtlety. discipline and respect seemed to be waning and any mention of such occurrences brought scorn and a swift reprimand.
Brother Abbas
It was many months later, as the legion was moving in system in the Istvaan system that Artuas felt something was truly amiss. He could not say what it was this feeling he had, and it angered him as this feeling flew in the face of all the honour and pride he had felt since his induction into his beloved legion, but it filled him with a sense of foreboding that drove him act.
Feigning homage to warrior lodge and secreting an attendance, Artuas's fears were soon realised. A schism had formed within the legion and a "purge" was soon to occur and purify the Sons of Horus.
Gathering the only two remaining terran brothers Artuas knew, Khol and Abbas, the trio bluffed thier way onto a mechanicum service frieghter to work their way towards the outer vessels of the fleet. Once there a warp capable shuttle was stolen and the trio made a run for it.
Brother Khol
With neither truly comprehending the rashness of their decision, or the reason for acting on it, they spent almost 16 months Terran standard, jumping from system to system to reach terra. It was there as they entered Sol system again for the first time in decades that they were not greeted with the majesty of the Throneworld but by a juggernaut of war and fortification. 
The VIIth legion was making its mark upon Sol and upon announcing thier arrival to the system monitors, Artuas and his brothers were quickly boarded and detained. Marked as traitors and held captive within the bowels of the Phalanx, the three legionaries were subjected to many long months of scrutiny and interrogation. Though confessing to abandoning their legion they never renounced their vows to the Emperor, claiming they only wanted to continue the great crusade for his glory.

But there was also another reason. Revenge. Honour and pride had been all but stolen from him and Artuas wanted revenge for the wound he felt to himself and to the Imperium. After being granted clemency, Artuas and his brothers would soon find the chance for revenge along side the warriors of the VIIth legion.

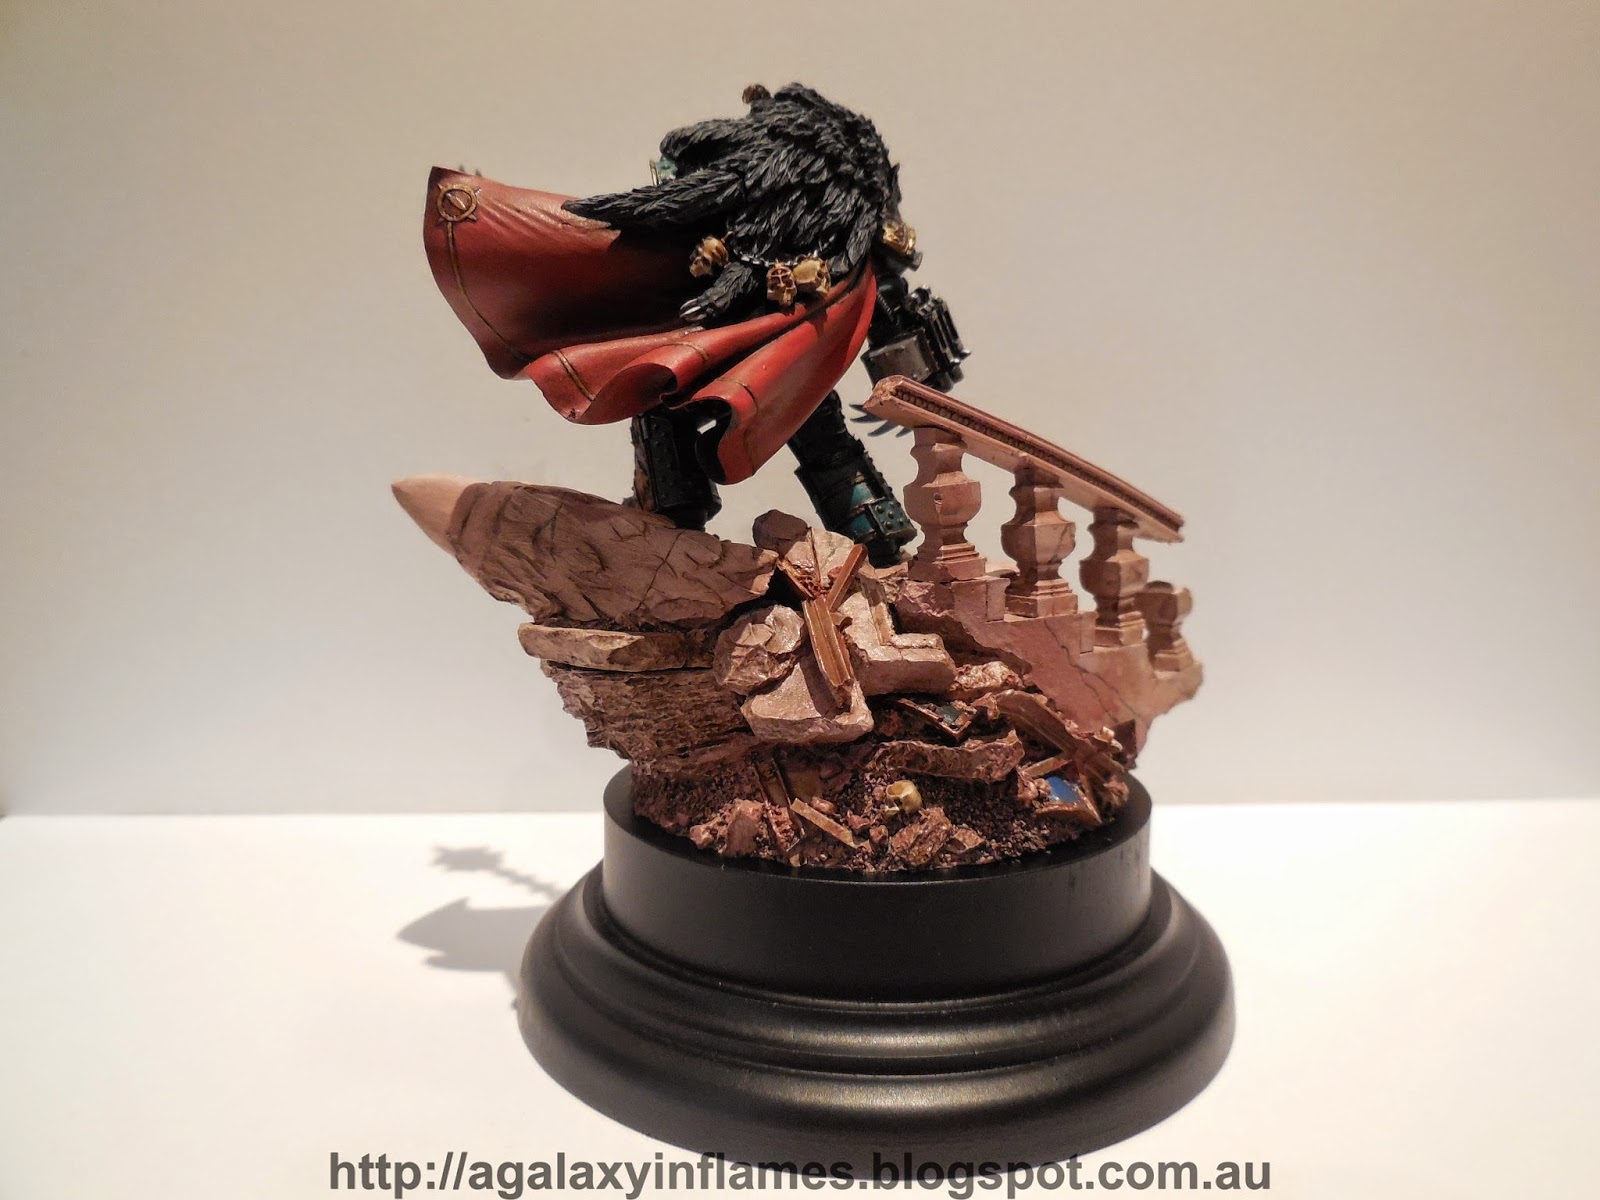
These guys are simply the first three of my blackshields marauder allies for my fists. A feel good hobby project of mine where i just wanted to paint some of the other legions, quickly turned into a fully blown Blackshields ally force. I wanted to model these guys to look like a small pack of fast moving hunters. each has his own weapon and style but together they form a tight pack of efficient killers. 


Tuesday, 8 September 2015

Fear the Reaver!!!


Gday Guys, Keepy here.

In recent times some of our other authors have written about legion specific Rites of War or units, and a few of you have requested something on Sons of Horus. As the resident player of the mighty XVI, I am more than happy to give you some thoughts of mine.

I am still play testing and getting my head around a competitive army for the Sons of Horus Rite of War, The Black Reaving, so I will leave this for now. What I have been playing with much success are the Reaver Attack Squads. I have never really used them much until recently, and I think I have found a few guidelines (albeit expensive ones) on how to use them.

Reaver Attack Squad Basics


To start with, lets have a look at the unit itself. A Reaver Attack Squad costs 135pts base for a unit of 5 models, including a Chieftain (Sergeant) with the option of taking up to ten more models for 15pts each, taking up a Fast Attack slot. The stat lines are nothing to write home about, fours across the board with the exception of attacks, two base for a Reaver and three base for a Chieftain. These stats are pretty much on par with a Legion Veteran Tactical Squad, again with exception to the Chieftain. They come equiped with Power Armour, Bolt Pistols, Chainswords / Combat Blades, Frag and Krak Grenades.


The Reavers also come with some pretty handy special rules, Assassin's Eye and Outflank, on top of the usual Legion Astartes (Sons of Horus). Assassin's Eye gives the entire unit Precision Shot and Precision Strike despite not being characters, very handy for getting rid of that Sergeant or Apothecary before laying into your target unit. As long as the Reaver unit is not equipped with Jump Packs, it may also take a Rhino or an Anvillus Pattern Dreadclaw as a dedicated transport.

So we have some handy rules and a couple of transport options for an otherwise mediocre stat-lined unit. What makes these guys any good?

Thursday, 19 February 2015

2000pts Sons of Horus - Playtest and Tweak


G'day all, Keepy here with a quick revisit from the previously posted army list for the Sons of 
Horus. The original army list can be found here.

So I had my good mates Buzz and the Dice Wizard himself Braden (from the Dicewizard blog) come over for a friendly playtest game on the Istvaan III board (which is still a WIP.... why do I have so many half finished projects?!) and play test my SoH list as well as give Buzz's Dark Angels list a run.

Buzz's list went something like this:


+++  2000pts Dark Angels (using Stubborn) +++


HQ

145pts Legion Chaplin w/ Artificer Armour, Jump Pack, Power Fist, Refractor Field

145pts Primus Medicae w/  Jetbike, Meltabombs, Refractor Field

Elites

65pts Apothecarian Detachment (x1) w/ Artificer Armour, Power Weapon

Troops

380pts Legion Assault Squad (x9) w/ Combat Shields, Meltabombs, 2x Power Weapons, Sgt w/ Artificer Armour, Pair of Lightning Claws

240pts Legion Tactical Squad (x14) w/ Close Combat Weapons, Sgt w/ Artificer Armour

Fast Attack

170pts Legion Javelin Attack Speeder Squadron (x2) w/ 2x Cyclone Missile Launchers, 2x Mulitmeltas

300pts Legion Jetbike Sky Hunter Squadron (x6) w/ 2x Plasma Cannons, Meltabombs

270pts Legion Storm Eagle Assault Gunship w/ 2x Twin Linked Lascannons, Twin Linked Heavy Bolter

Heavy Support

135pts Legion Sicaran Battle Tank 

150pts Legion Vindicator w/ Combi-Bolter, Machine Spirit

+++ End List +++


Modus Operandi: The Chaplin would attach to the Assault Squad to make them Fearless and also give them hatred. They would look for targets of opportunity or go tank hunting with Meltabombs. The Medicae Primus would attach to the Jetbike Skyhunters, giving an already tough unit FNP. The Tactical Squad loads up into the Storm Eagle and provides aerial fire support as well as a scoring unit which can be used for last minute objective grabbing. The Land Speeder would outflank, and put some hurt on the rear armour of tanks or use Frag Missiles to hit squads. The Vindicator could move 12" and still shoot it's Demolisher Cannon thanks to Machine Spirit, giving it a heap of range, and the Sicaran was there for all round dakka / AA duty.


As you can see the Dark Angels are very mobile, and can put out a fair bit of dakka whilst still being choppy. It wasn't until I put out all my models that I realised that the SoH list was missing something, I couldn't put my finger on it but it just looked light on the ground. I won't go into a full battle report, but the key points / events were:

  • The Sicaran and Venator are nearly permanent choices in a conventional 30k list. The Venator popped most of the armour and the Sicaran drew a heap of fire, and also denied the Javelins jink saves which brought about their end. In saying that, Buzz rolled badly whilst trying to outflank them, and they turned up auto on Turn 4. Then he rolled up the outflank side with no one on it. Le sigh.
  • The Seeker's Dreadclaw scattered onto terrain and went into ongoing reserves. They showed up on Turn 2 gunning for the Jetbikes who were Deathmarked, but they were locked in combat with one of my Tactical squads... so they intercepted the DA Assault Squad instead, killing all bar three and the Chaplin. There were no other targets available so they held an objective, the Dreadclaw went flying off to either flame units or act as an area denial piece for the Storm Eagle.
  • The DA charged their Jetbikes into the first Tactical Squad which was holding an objective, the Medicae Primus and the Tac Sgt ended up in a dual for four turns and could not kill each other (many lols and angry shouting at dice). This left both squads tar pitted until it turned into a massive battle royale with both the remains of the DA Assault squad and the full strength second SoH Tactical squad charged in! It was pretty funny to watch and play with this mass of 50 or so bodies fighting around an objective.
  • The SoH Landraider really didn't achieve anything and the cheap version I purchased didn't have the assault rule. So instead of saving me points for other things, my counter charge unit could not counter charge, making the command squad kind of redundant as they could not reach any combats without being shot to pieces first. 


So that was a general summary of what happened. SoH managed to get a win, but it was neck and neck until the bottom of Turn 5. It would have been a different game if those speeders came on. GG Buzz! Mucho fun. From the game I learnt a few things about my list and some glaring faults with it. After the game Buzz, Braden and myself sat around for a while and discussed a few options with how to improve the list. Some observations and changes were:


  • The Command Squad in a Proteus Landraider is a very ineffective way to run them. Not only could they not assault out of the vehicle, but the 7th Ed FAQ also means that the Legion Standard does not effect models outside the vehicle like it used to. They need to be dismounted for others to benefit from the 6" Fearless bubble. The fix? It worked out for the command squad to ditch the Landraider and take Jetbikes was 25pts cheaper. Easy fix! This left a big points gap for the Praetor who had to upgrade to have a Jetbike, and while I was at it added a Powerfist. I will discuss where the points came from shortly, but the reason for the Powerfist is so that with a Paragon Blade, you have two specialist weapons and gain an extra attack, as well as a good anti-tank option for mulit-hits, unlike the single shot Meltabomb.
  •  Legion Tactical Squads at full strength of twenty are rather unwieldy. They can put down a heap of fire and have excellent overwatch capability but it is not very often you have all twenty in rapid fire range or LoS of your target for maximum effectiveness for Fury of the Legion. The good thing was that if you took a few casualties, it was hardly noticed from damage output. Rather than keep the big squads, each one got cut by five men freeing up 100pts to use elsewhere (see Command Squad above).
  • Legion Seekers did well but once the spent their combi-weapons they ran out of punch. It was nice to have BS 5 and preferred enemy on a chosen unit, but as soon as that target is unavailable or destroyed then they really don't have a job that they can do effectively. These are going to be replaced with a 9 man Legion Tactical Support Squad with Plasmaguns, mounted in a separate fast attack choice Dreadclaw. No BS 5 or Deathmark rule, but you can fire them all day until your hands melt off (which will no doubt happen on numerous occasions).
  • Apothecaries were solid. They saved about 50% of the casualties that would have been thanks to some good rolls and really kept the Tactical Squads in the fight. With the Command Squad going to Jetbikes, it will cost too much for a Medicae Primus to attach to them, to do so would cost me a unit or vehicle which I am not prepared to drop at this stage. I also dropped two of the Augury Scanners from the the two Apothecaries that will be supporting the Tactical Squads. They are nice to have but they really didn't get used. Most things that turn up on Deepstrike / Outflank are vehicles, and bolters can only do so much. I kept the one for the Seekers / Support Squad as they may actually do some damage to tanks / terminators / flyers, unlike bolt guns. Apothecaries were also upgraded to have Artificer Armour to give a bit more protection.
  • Vehicles were solid. The only upgrades that would be good would be Dozer Blades and Armoured Ceremite, but with only 5pts left to spare the Sicaran got a Dozer Blade to enhance maneuvering.


 Implementing these into the new list, it looks a little something like this:


+++ 2000pts Sons of Horus +++

HQ

215pts Praetor w/ Iron Halo, Paragon Blade, Powerfist, Jetbike

395ptspts Legion Command Squad (x5) w/ Jetbikes, 5x Combat Shields, 4x Power Weapons, Power Fist


Elites

170pts Apothecarion Detachment w/ 3x Apothecaries, 3x Artificer Armour, 1x Augury Scanner

Troops

240pts Legion Tactical Squad (x15) w/ Legion Vexilla, Sgt w/ Artificer Armour, Powerfist, Meltabombs

240pts Legion Tactical Squad (x15) w/ Legion Vexilla, Sgt w/ Artificer Armour, Powerfist, Meltabombs

310pts Legion Tactical Support Squad (x9) w/ Plasmaguns, Sgt w/ Artificer Armour, Meltabombs

Fast Attack

100pts Dreadclaw Drop Pod

Heavy

190pts Sicaran Venator Tank Destroyer

140pts Legion Sicaran Battle Tank, Dozer Blade


+++ End List +++


I am pretty happy with the tweaks, the Jetbikes for the Command Squad will make them much more
self supporting, speedy and most of all useful rather than a points sink that doesnt get used. Tac squads are a bit easier to use but still have a pile of wounds, and the bulk plasma in the Tactical Support squad should be enough to hurt nearly anyone. 

So... What do you think about the changes? I would love some feedback guys.

Till next time

Keepy


Friday, 13 February 2015

2000pts Sons of Horus Army List

Gday all,

Keepy here after a bit of a hiatus from all things blog. I have a few things in the works regarding the Istvaan III build and a few other projects, so today's post is a good break from those and exercise my poor under nourished brain a bit.

I have found my love for the Sons of Horus again, and have shelved the Mechanicum for a while. Just a bit tired of playing them I think, and need a change to keep my interest up.

This is a bit of a play test to see what units I paint first, but also to see what I can get for 2k worth of points. This list is supposed to be a bit fluffy, but with a kick to it:

2000pts Sons of Horus

HQ

150pts Praetor w/ Iron Halo, Paragon Blade
195pts Legion Command Squad (x5) w/ Combat Shields, 4x Power Weapons, Power Fist
200pts Proteus Land Raider (Dedicated Transport)

Elites

150pts Apothecarion Detachment w/ 3x Apothecaries, Augury Scanners

Troops

290pts Legion Tactical Squad (x20) w/ Legion Vexilla, Sgt w/ Artificer Armour, Powerfist, Meltabombs

Fast Attack

400pts Legion Seeker Squad (x8) w/ Combi Bolters, Dreadclaw

Heavy

190pts Sicaran Venator Tank Destroyer
135pts Legion Sicaran Battle Tank


Modus Operandi: Apothecaries split up with the two Tactical Squads and the Legion Command squad, they are equipped with augury scanners so they also give these units the Interceptor special rule if my opponent plonks down a pod or somthing in range... And of course gives them all FNP. The Command Squad mounts up in the Land Raider and will sit inbetween the two Tactical Squads acting as a counter-charge unit as well as giving off a 6" Fearless bubble from the Hull of the Land Raider thanks to the Legion Standard. Tacticals also have Legion Vexillas as a backup in case out of Fearless range. This combined blob is the core of the army and provides a massive footprint on the table to dominate / hold ground with.

The Sicaran and Venator will both work the flanks picking targets / transports to pop for the Seekers, as well as acting as a defensive / cut off unit for fast movers. Seekers drop down in the Dreadclaw T1 and smoke a high value / threat target (for example, a Jetbike squad) with a mixture of Combi Plas/Melta. If they survive longer than two turns then they can load up in the Dreadclaw again and hit something else a bit more squishy with their special ammo.

There are plenty of hobby things I would love to do with this list, the main one being a Land Raider with a massive Sons of Horus banner on it, like this image from Visions of Heresy:


I am pretty sure this has already been done, but it is something I can see tearing around the battlefield insipiring troops to crack on and fight through!

The Sons of Horus command squad is the other project, with instead of being modeled with big combat shields, placing the small  buckler style shields you see in the generic legion command and on 40k terminator Sergeants. And of course, plenty of SoH iconography and parts.

While writing up this list I thought of several alternatives you could do that would also be great hobby projects. If you ditch the Land Raider and give the Preator and Command Squad all Jetbikes, it comes in 10pts more expensive. You lose FNP due to no Jetbiking Apothecary, but you get speed, toughness and alot of heavy weapons fire with some chop to it as well, not to mention a Jink save. Seekers can also be replaced with a 9 man Tactical Support squad with Meltas / Plasmas for the same cost as the 8 man Seeker sqaud, you gain consitant plasma / melta fire but at the cost of BS4 and no Death Mark special rule for Prefered Enemy against a target. If you wanted to free up some points you could also cut 5 legionares from each Tactical Squad, making them a bit less unweildy and freeing up 100pts to play with.

Anyway, what are your thoughts? Good? As bad as a Macca rant? I would love to get your thoughts on this and discuss!

Keepy

Thursday, 31 July 2014

Horus The Warmaster: Part 3

Ok, here it is, part 3. You can find Part 1 and Part 2 here respectively. This was a long and painful process, but in the good way like going for a run, you hate it during, but after you feel good/fat/slow. All up it took me about 10 hours to do the entire model, which is saying something as I am known around my friends as a bit of a speed painter. I also have been told I take shortcuts, and I suppose I do, however my shortcuts come from years of painting experience, where I pre-plan a miniature for ages before I commit paint to mini. An example of this is Lorgar. I haven't touched him yet, but I already have 90% of the paints picked out to use, and I know the colours I want for each area already. This will save me a lot of time and experimenting later.

Well, that's enough from me I suppose, I guess I had best crack on with what everyone came to see, Horus, The Warmaster.


So that's it, Horus Lupercal, The Warmaster. If you have any questions, or you want to soul-suckingly tear down my techniques, feel free to comment below.

~Macca

Monday, 17 March 2014

Mechanicum WIP 4


Gday Guys,

Keepy here with the last WIP for the 1000pts Mechanicum army project. During this post we cover weathering, oil washing and decal application on the Castellax Battle-Automata and Thallax Cohort. So without further ado lets get to it!

So back to our hundreds of parts on sticks - I gave one of the models a test coat of an oil wash over gloss and it come up a treat. There is a tutorial to using oil washes here.


Test oil on the Carapace only

I also applied decals at this stage - An affiliation to the Sons of Horus on the black pad with squad markings and Mechanicum on the right. There is also a serial number on the chest


Decals were applied using Micro Set and Micro Sol so the line of the transfer looks less apparent. Make sure you gloss up the surface before applying as this helps for a better adhesion and seamless blend into the model. I have used some less used Sons of Horus iconography to represent these being attached to the 63rd Expedition and have been given a sutle mark to show support to the Warmaster prior or during the Istvann III campaign. They will make a great allied or embedded force to compliment my Sons of Horus legion.

I did a test of chipping with Mechanicum Grey and Leadbelcher using the sponging technique and it came up rather well. For a tutorial on sponging head over to Macca's post here. All the weathering was done before the oils but after the decals were applied, this ensures that damage goes over the top of the decals for a more realistic effect.


With the oil test done it was time for some weathering on the whole fleet before more oils could be applied

Weathering, decals and oils done on the carapace only

Fresh oil coat

Test model in progress


The whole Castellax fleet weathered

Oils to come next

Oil coats done

Castellax basically done, just need a matt coat to dull down the gloss and retain detail

Thallax detailing done

Thallax decals done, about to apply damage and oils


I was really pushed for time to get these done for a tournament in time, so to accelerate the oil drying process (which usually takes about 24hrs) I tried a bit of experimenting and put them in a fan forced oven. Really. Don't go over about 50 Deg C and check it constantly. If the temperature is too hot you will start to smell burning resin, take them out immediately! My minis escaped any damage despite being a bit soft and bendy and after about 4-5hrs the oil was dry enough for me to finish the models.
In the oven!

Hurry up and dry!


With all the components painted and finished it was time to assemble to force en-masse. Much cutting of toothpicks from models, each part had to have the paint removed from the joining points so the parts would stick together. If this is not done then the paint will just peel away and your model will fall apart.

Finally off the sticks and onto the base. I ended up with a mountain of toothpicks by the end of the build


Well that's all for this post, I am getting together some high res photos of the Mechanicum force, I was pretty blown away with how well they turned out.

Thanks for dropping by, as always your comments and criticisms are welcome.

Cheers


Keepy

Links:

1. Mechanicum 1000pts List
2. Mechanicum WIP 1
3. Mechanicum WIP 2
4. Mechanicum WIP 3 - Basing
5. Mechanicum WIP 4
6. Mechanicum 1000pts Completed!


Thursday, 30 January 2014

Justaerin WIP / The Emperor's Legions


Gday all!

I was supposed to be giving you an update on my Justaerin Terminators but a couple things have come up and they are going on the shelf for a little while. I will explain myself in a minute, but a quick look at where we are at with the Justaerin.


Not too much more progress, I have airbrushed in the red on the shoulder pads (they are supposed to have only their left shoulder red, but after Abaddon both red looks really good) and done a base coat of the Eyes of Horus with the airbrush as well, which was tedious work. The one on the right was a test model for colours and needs some touching up, and I have 4x sets of lighting claws that swap out with the power weapon, a powerfist guy and the two TH/SS. They are up to the battle damage and detail stage and that is where they will sit until the next project is done.

So what is this next project you ask? Well my good friend John at The Painting Bunker is running his first tournament in Brisbane in mid March, called "The Emperor's Legions". It is a 1000pt tournament with only 10 positions available, 5 Loyalist and 5 Traitor. Tickets were pricey but the prize pool is enormous (with things like Spartan Assault Tanks and Legion Fellblades as prizes) so well worth it, and John has some amazing terrain so this event is all about looking good and running smooth. Naturally I bought a Traitor ticket to cleanse a few loyalist scum.

John even made some special objective markers for his event, and those participating get a set each, I got mine in the mail today! He even included a personalised note giving it a nice touch. You can find out more about the objective marker here and the tournament here.


I was planning on using the Justaerin led by Abaddon in the tournament, but both units are very overcosted in my opinion. The Justaerin are a whopping 225pts for three models in stock equipment and don't bring a lot to the table apart from looking cool. Abaddon is a bit of a beast in combat but when you compare him to the likes of Calus Typhon, point for point you really lose out. With such a small army that doesn't have a lot of punch I would be lucky to survive turn two. I had a back up plan, and it arrived in the mail earlier this week in the form of a small Mechanicum army. They have some great units (especially in book two) and love to spoil a loyalist Astarte's day out.
 
 
So that's the plan in a nutshell. I am really looking forward to this tournament, win or lose it looks like it is going to be heaps of fun. Did I mention it was being held in a pub? Oh yeah! Knowing a couple of the players going, I reckon they will be hard pressed standing up by the afternoon. Stand by for Mechanicum WIPs!
 
 
Cheers
 
Keepy

Sunday, 26 January 2014

Justaerin / Cataphractii Terminator Bases - Finished

G'day again!

This post we pick up where we left off with the Justaerin Terminator bases. Veteran hobbyists need not apply, but for those who are new this will show you the fine (read: messy) art of using weathering techniques.

Here is a sneaky shot I forgot to put in the last post with all the assembled models and bases:


After undercoating I started with five test bases, just in case I stuffed the whole lot. Working with only the airbrush (you can also use a watered down coat applied by hand), a base coat of GW Mechanicum Grey (yes, I really like that colour) was applied to the whole base. The concrete sections then had a coat of GW Codex applied, again with the airbrush. Dial the pressure right down, but the over spray will play into things when the pigments are used. Then the metal parts like the mesh, steel sheets and cables were all painted with GW Leadbelcher, and the timber parts done with GW Bestial Brown. Any bones or skeletons are airbrushed with GW Rotting Flesh - I know, Green right! But it works, trust me. The light green works as an optical illusion to the greys as a bone colour will blend right into the base. We now have a base coat.


 This is where things get messy. Very messy. If you have never used pigments before I suggest you use a sheet of paper underneath your work, and wear latex gloves. This stuff will go EVERYWHERE.

Weathering pigments have a couple of different applications, but today I will just focus on its primary one - being brushed on as a powder direct to the model. Using them is really easy. Simply take an old brush, load it up with a bit of powder, then press it into the areas you want it to go. Don't get too worried about putting too much on, with this method you can layer the powder up bit by bit. The pigment will not set on the model until you have set it on with a white spirit. I use Tamiya X20A airbrush thinner - sounds silly but works a treat. The more thinner you apply the less visible the pigment will be. The first hit with the airbrush will blow off most of your excess pigment, leaving only the stuff that you applied firmly with your brush. Give it a light dusting of thinners and your done. That's it! It takes a bit of practice but once you get the hang of how much to use and how to set it onto your models, you can bang out a heap of quality product fairly quickly.

The real key to successful use of pigments is what colours you apply to where. I used the Secret Weapon pigment range of Exhaust Black, Red Brick, Ash Grey, Ancient Earth and Green Earth. I started with Exhaust black around all the shadowy areas and at the base of significant piles of debris, under metal plates etc. Red Brick was used on anything metal to give a rust effect, then another coat of Exhaust black to Darken them up again. This gives the appearance of being burnt. Ash Grey was used on the brick / concrete areas on raised edges, but used very sparingly. The skeletons / bones were given sporadic hits of Ancient Earth to give a mouldy appearance, and splotches of Green Earth had the same technique applied to the bases whole for the same effect.

Pigments are usually the last thing to be applied to a model - but I will be finishing them with a selective wash of the old GW Devilin Mud. Give a generous coat, but try not to hit the areas that have lots of weathering powder, particularly the greens or you will lose out on the effect. The last thing done was paint up the brass shells to look fresh out of a boltgun. The bases are then given a sealing coat of Testors Dull Cote, but Tamiya Clear Flat gives the same result, locking on your detail and giving it protection from the years of handling from gaming to come. Here are the first five:


Happy with that! All they need now is a bit of a clean up around the rim, which is done with another coat of Mechanicum Grey from the airbrush again. A very light drybrush of the old GW Fortress Grey will top off the bases nicely. The whole lot for the Justaerin and the Cataphractii Terminators were done in one hit, taking about an hour and a half from undercoat till clear coat. I am fairly happy with how they came out:


Lupercal! Kill for the living! Kill for the dead! This shot is a bit over exposed and they look a bit darker than they actually are.


So there you have it, how to crack out a heap of basing in a couple of hours. Hope you enjoyed it and got something out of the last couple of posts.

Cheers

Keepy

Justaerin / Catapharactii Terminators prep


Saturday, 25 January 2014

Justaerin / Cataphractii Terminator Bases - WIP


Gday again,

Keepy here with the latest in my hobby instalments. This is yet another catch up post, most of these were built at the same time as the Justaerin and Abaddon build. Once again, seasoned veterans of the hobby probably wont get much out of this, but people who are new to the hobby or not used resin bases before will definitely get something out of this.

I have used a combination of Secret Weapon's Urban Rubble and Urban Streets bases and had planned on adding to them to get a real Istvann III look about them, with plenty of rubble, razor wire, shell casings etc. This seems to be a thing with 30k at the moment and I really like how they add to the model and it's environment. They can be overdone, but if you keep it simple you can't go wrong. Macca promises me a full tutorial in our new "How to" posts, so stay tuned as to how to churn out a whole armies worth of basing in just a couple of hours.

As previously mentioned the Justaerin post, the first stage of your prep before painting should be to wash your models in warm soapy water to get rid of the mould release. This is done a bit earlier on the bases as I am using wood glue to hold on rubble etc so water will dissolve all that hard work! I started by test fitting the completed models onto the bases and worked out which models best suited what bases. This is another good reason not to glue the arms or the head of your models on before basing, as these have gutters, step downs and plenty of rubble that change the angle of the model and therefore change it's pose. Once the models had been allocated a base, they were all numbered off by using permanent marker on the reverse side of the base so no mix ups would occur and basing could begin.


Holes were drilled and pins were added so each model would be pinned onto it's base to prevent them snapping off in the future. Happens more often than you would think, particularly with resin. I have used thumb tacks cut from the head to use as pins, they cost a whopping AUD$1.00 for a pack of 100 from the local bargain shop. I added the larger articles of debris from the GW basing set, things like the steel with bullet holes in it, some mesh, cogs and checker plate (aka diamond plate), these were twisted with pliers to give a destroyed look. I started by trying to add varying grades of slate / sand / rocks but it looked terrible. I mixed up an aggregate of sand, small and medium slate / rocks and added it together - and the result was much better. I added larger rocks here and there, as well as patches of dirt sporadically around the base, taking care not to do anything that would prohibit the model from having a neat fit.


Final details of spent bolter casings from Secret Weapon were added, and the pièce de résistance, I found some Verlinden barbed wire to put on as well. This stuff comes in straight runs, so you have to clip it off and twist it around a pen or something to get it to coil like real barbed wire. Now here's the thing - It is model razor wire - but it is freaking sharp and might as well be made of razors for anyone who is considering using this stuff! It didn't draw blood, but it gets caught in your skin as you try to manipulate it. Yes it is really that sharp! nothing like a bit of realism on your bases and I can safely say that most of them have bits of my fingers on them, now sealed in black primer awaiting to be re-discovered in thousands of years for scientists to clone me and stick me in a zoo.


Keeping your bases separate to your minis has a couple of boons - not only can you get a highly detailed base but you can also get to all the hard to reach places on the model as well. To hold your bases onto the spraying surface (in this case an old Leman Russ Tank box) with a couple lengths of packing tape turned upside down. Just stick your bases (or models for that matter) onto the tape and viola, no more resin parts flying around the place when you put them to the spray can.


Well, that's all I have time for now, in the next WIP we will cover weathering pigments, washing and a spot of highlighting.

Till next time!

Keepy