Showing posts with label Basing. Show all posts

Wednesday, 11 November 2015

Imperial Armour Modelling Masterclass Review

G'day guys, Macca here and I have for you a review for both Imperial Armour Modelling Masterclass books. Since the Horus Heresy Modelling Masterclass is supposedly at the printers, it seems like a good time to look back at these babies. (I actually only got two new copies of my own this week)


Friday, 6 November 2015

Imperator Titan: Complete

Finally, the Legio Mortis engine, the Imperator Dies Irae is complete, and ready to lead my Legio into battle. This was a fun project, and despite being a 90's kit, I feel I have made it work for the newer more grim-dark 30k. The original miniature of course is well known as the walking church.

The overall engine stands 155mm tall (a touch over 6" in the old system), making it around 35mm taller than the original kit. This will hopefully give the unit more height to help it stand above the newer Reaver sculpts (which clock in at around 90mm).


Saturday, 30 May 2015

A Galaxy In Flames Tutorial: Creating Zone Mortalis Themed Bases

G'day, Macca here and today I want to show you how to create bases to match your Zone Mortalis or any kind of ship decking. To start with you will need:

-suitable bases
-some low grit sand paper (P800 should be good)
-some plasticard
-assorted hobby tools, including a stanley knife or box cutter and scalpel;
-a pin drill


First thing you have to do is sand down the top of the base. This is because the base is textured and will require you to cover the whole thing in plasticard if you don't want texture.


Once you can see all the little dimples in the surface are removed, you're ready for the next step.


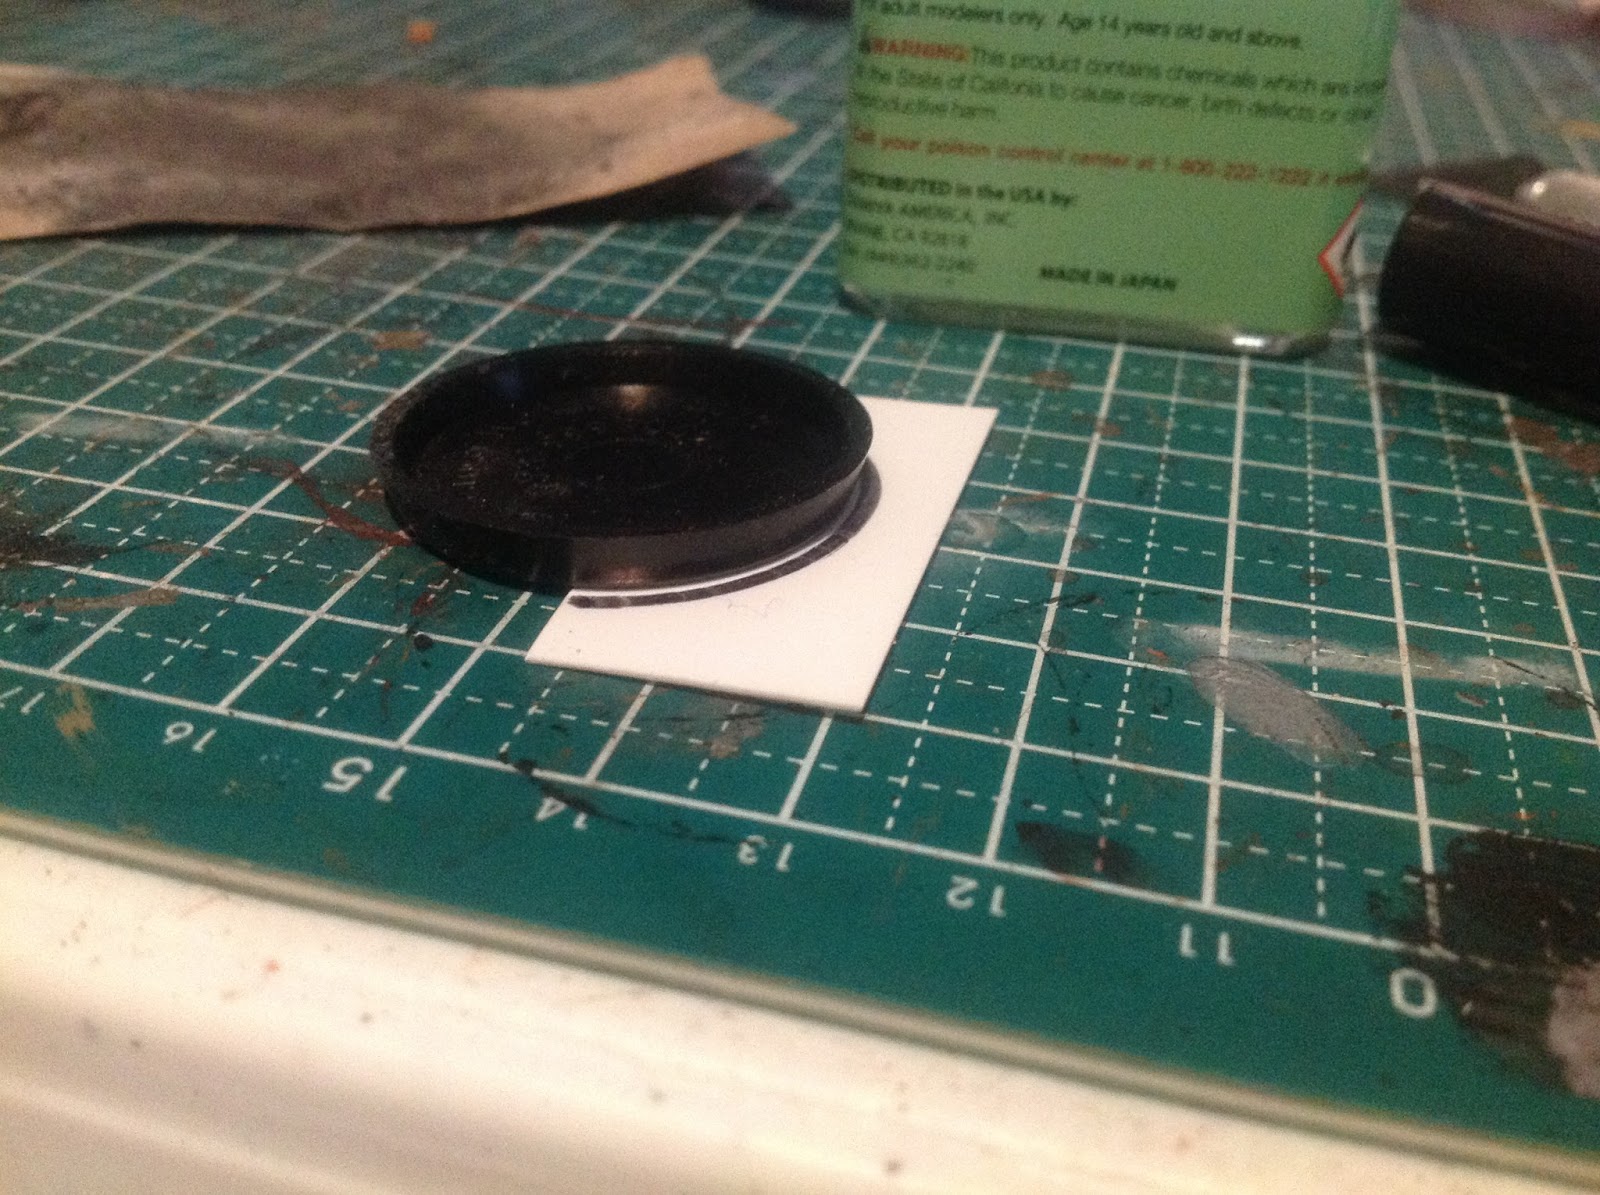
Cut a piece of plasticard, it doesn't have to be precise, just get it a bit bigger than half the base.


Then, cut some kind of interesting pattern into one side. It could be triangles, squares, any sort of geometric shape. Whatever shape you pick, try and make it central so it covers the injection mold hole in the centre of the base.


Flip the base over and quickly mark out the rough dimensions of the base, then, cut the plasticard roughly to size.


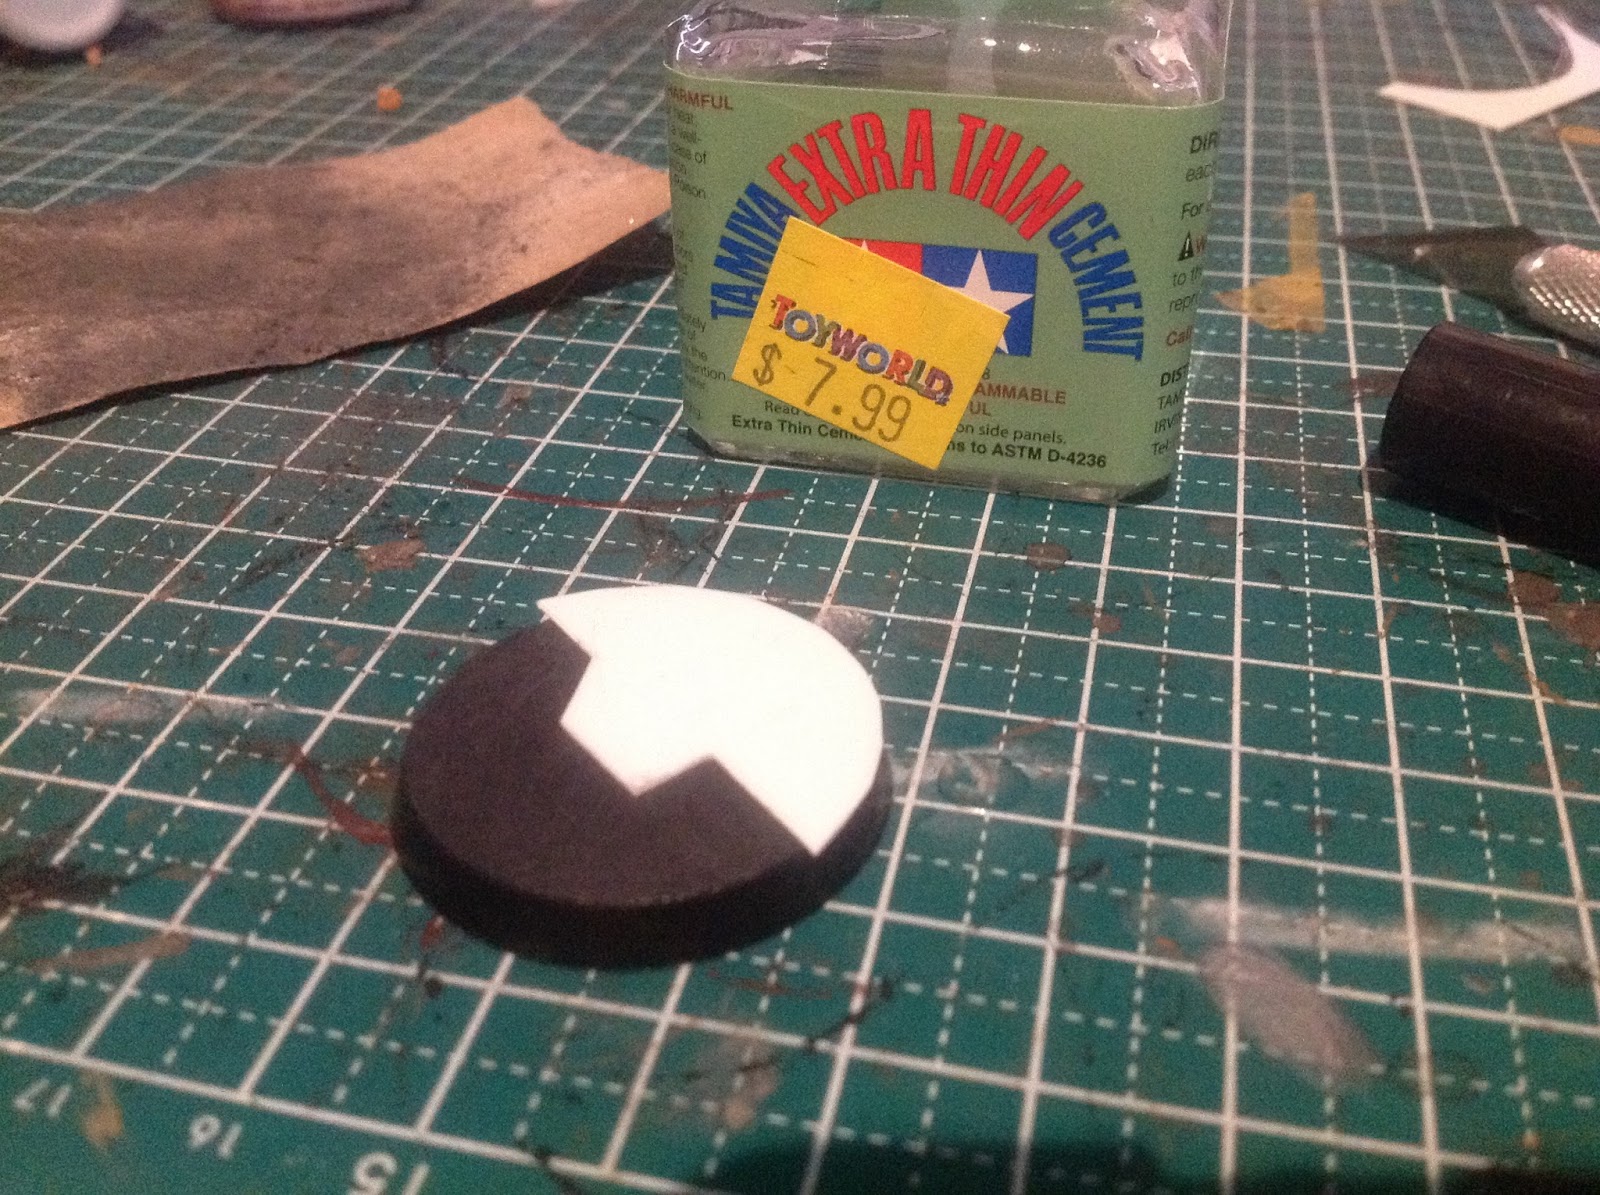
Next, glue the base to the plasticard, try to use a thin cement, as you don't want globs of plastic glue to seep out from under the plasticard and ruin the smooth surface.


Next, once the glue has dried, go back and smooth out the edges using a hobby knife or clippers. I chose a knife, followed by a light sand.


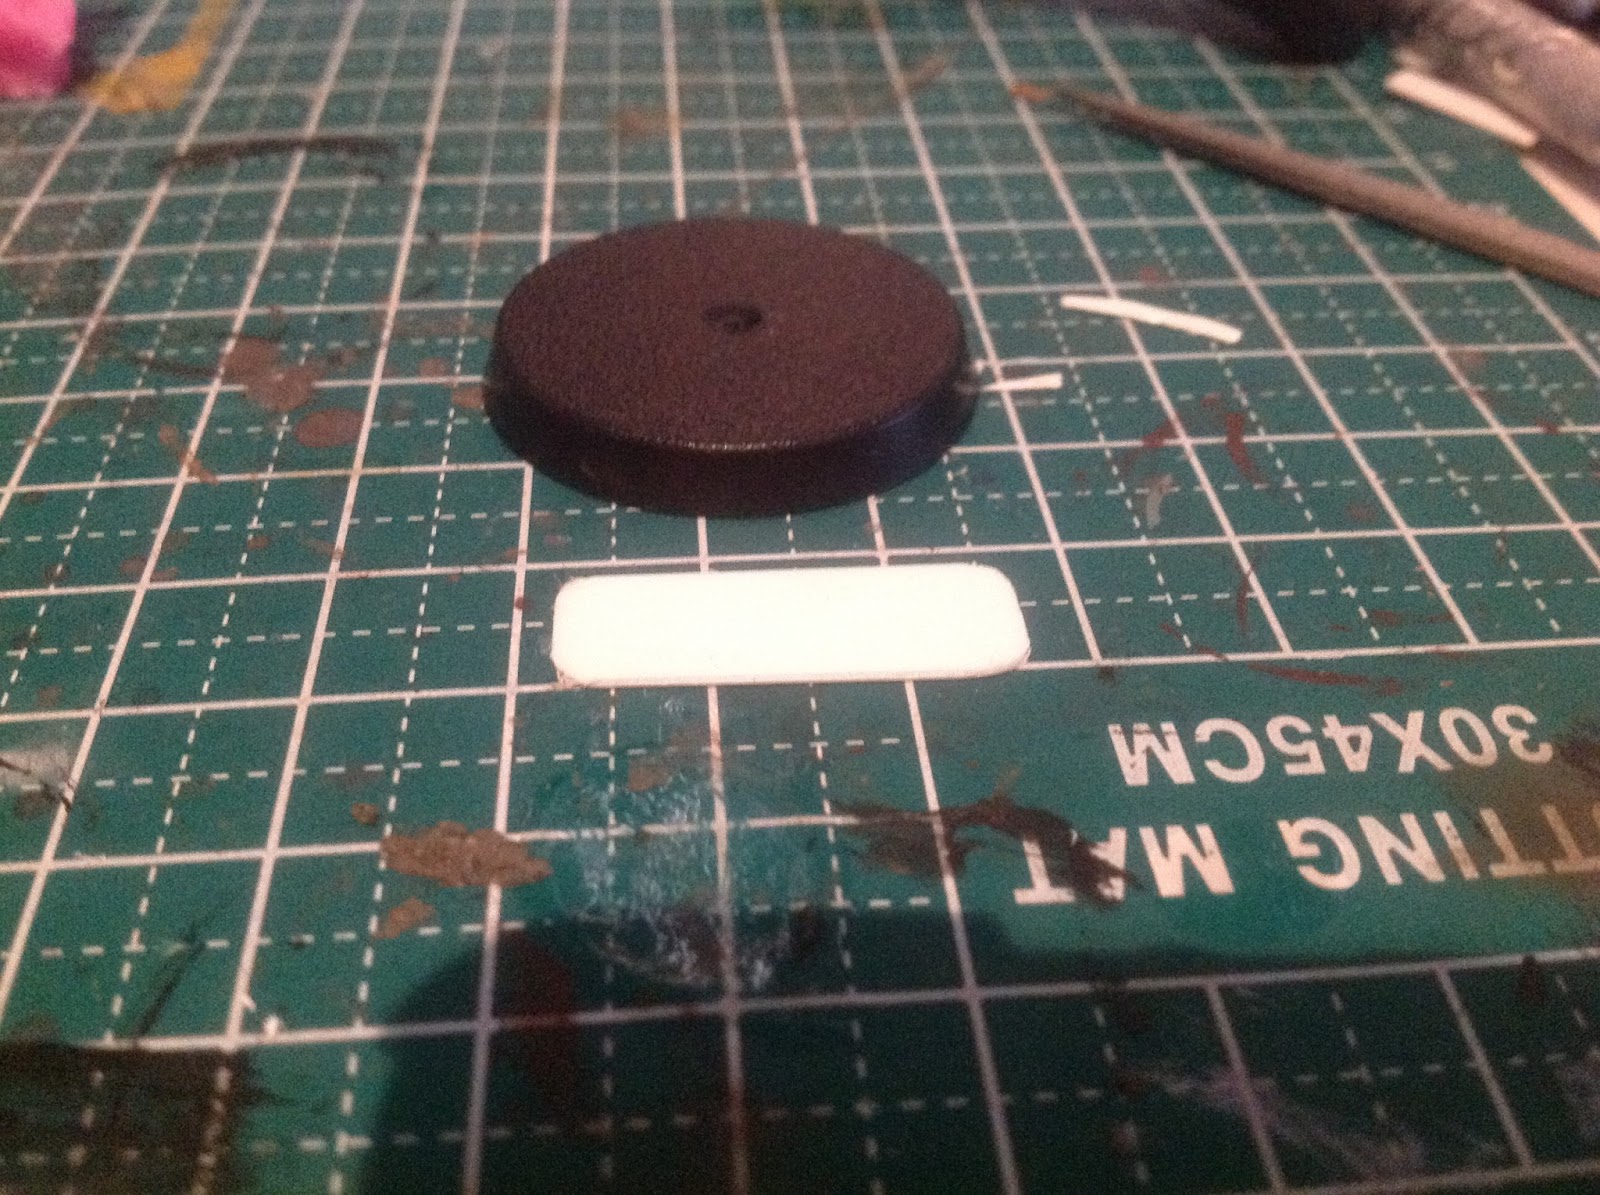
From here, cut a small piece of plasticard. This will add some more texture to the base.


Drill several holes, equally spaced along the strip, then, glue it to the base, and trim to size.


There you go, that's one base right there.


So repeat those steps in any way you like until you get the sort of bases that suit your zone style. You can make them more complicated with overlapping layers of plasticard, but I like the simple approach.

I will also go into how to crate your own decking vent. Cut yourself a piece of plasticard, and slightly round off the corners.


Roughly mark out the vents, then, proceed to drill them several times. about 5 holes along works well in this case.


Now, take your scalpel and slice along the edge of each slot, until the holes are all 'joined together' into a rough slot.


From here, simply repeat the process for however many slots you have, and then once you're done, clean them with a file or scalpel until nice and smooth.


So there you have it, some easy DIY Zone Mortalis Bases. As I said, these can represent any kind of decking or metal clad surface. They are simple, and they are cheap, and better yet, they can be any size you like.

I hope you enjoyed this tutorial,

~Macca

Wednesday, 27 May 2015

32mm Objective Markers From A Galaxy In Flames

G'day guys, Macca here with something new: Objective Markers! I sculpted up a pair of 32mm bases today, with plinths on them for placing your objective dice.


But guess what? I decided that we can have a bit of fun here, so I cast them up. Yes, these will be made available at AGIF tournaments and giveaways, and even for purchase directly from us in future.


What do you think of that hobbyists? If you like them or hate them, let me know!

~Macca

Saturday, 11 April 2015

Iron Warriors Contemptor Talon

G'day folks, Macca here with another quick update on my Iron Warriors. Today I finished off my second dreadnought, so both the dreads I have are built, painted and based.


 Overall, I'm happy, however these models tend to suffer from a little 'too much going on'. What do I mean? Well, there are very prominent hazard stripes sculpted onto both shoulders, both greaves, one knee, and in two places on the torso. Enough of the hazards already! In order to make them work, I had to play around with a few powders, weathering and damaging them in order to subdue them into reality. To be honest, I probably won't buy this kit again, I'd rather a Death Guard Contemptor and I would just add my own hazards.


I actually brought the chainfists from Forge World, thought they looked like ass, and lazy ass at that, (normally I wouldn't bag a sculpt, but when I can grab a chainsword from my bits box and perfectly replicate the result in 5 seconds, that's a lazy sculpt) so, I decided to use the same trick off my Raven Guard and used bolter chain bayonets to create a 'jaws of life' scissor effect.


When it came to the bases, I used cork, textured paint from Vallejo, small shrubs from Army Painter and Secret Weapon's snow effects. To see how I did the snow, there is of course this video I made right here. Oh, and as another nod to Paramar, I used one of my 'ruined contemptor' casts, giving my contemptor something to stomp on.


That's all she wrote, see you next time,

~Macca

Sunday, 29 March 2015

A Galaxy In Flames Video: Snow Basing Tutorial

Hey guys, a quick video on using Secret Weapon's realistic snow to create snow effects.


We hope you like the video, if you do, let us know!

~Macca

Wednesday, 11 March 2015

A Galaxy In Flames Tutorial: Rebasing 25mm to 32mm

G'day all, Macca here with a tutorial and an update rolled together. Today we will be looking at rebasing our miniatures from 25mm plastic to 32mm plastic.


The idea today is that I will show you the simplest way to rebase, combined with some finished Iron Warriors, because... reasons?


Step 1:
To start with, I take a pair of clippers and cut the rim off from around the original base.


You should end up with a base like this, but you cannot and I must stress CANNOT just glue this to the new base. First, you have to remove all surface detail from the underside. This takes me to:

Step 2:
Place the miniature onto some large grit sandpaper, I chose P180. From here, you simply slide the base along, and within 10 strokes or so, the base will have smoothed out, leaving just a black smear of plastic on the sand paper.


Step 3:
Glue the 25mm cut outs directly to the 32mm bases. This is the easiest part of all.


Step 4:
Now, the fun part. As you'll notice, there is a noticeable rim left over. What you have to do here is blend it out. I used textured paint, in this case Vallejo Dark Earth, which comes in big tubs, thus meaning it doesn't dry out at a glance like GW's. I will note, that you can also use putty, or speck-filler products to even out the base.


I start in one area, and make sure to work my way around with a nice even coat. Don't be too picky, it's sand, and it should look natural.


So, with that done, that's how you rebase from 25mm to 32mm. I don't know who invented this approach originally, I do know that I used in on terminators when they went from 25mm to 40mm, however I was an inept hobbyist in those days, and failed to make such a clean joint. I'd share photos, but the quality of my miniatures back then is sorta like the Simpsons in season 1, it ain't pretty.

Now, some quick size comparisons.

Here are my Iron Havoks, the Autocannons on the right are only early in the painting process, but as they are an identical unit, for all intents and purposes, they work. First off, you'll notice that the unit footprint is HUGE now. Although I spaced the miniatures the same distance apart, the change is obvious. I can see this leading to some interesting situations with templates, with some positive AND negative situations.


Well, in the end, here's the finished result, with 2 HQ's, the command squad and Iron Havok squad one all rebased in the complete base scheme.


I hope you enjoyed this tutorial,

~Macca