Showing posts with label Gaming. Show all posts

Monday, 12 October 2015

An Introduction To 30k For 40k Players: Part 2


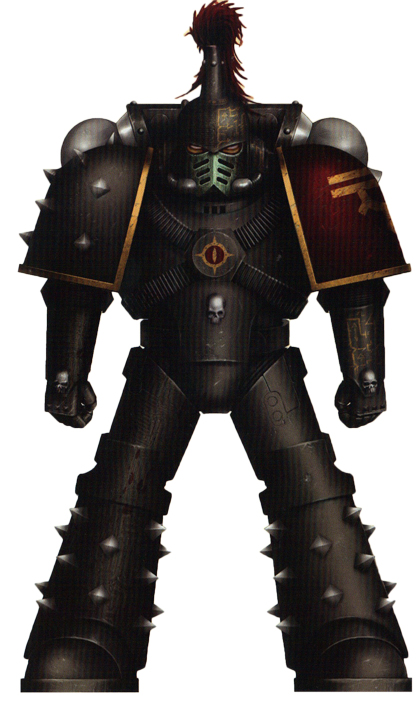
In Part 1, we looked at how the Force Organisation Chart and force selection in general worked. Today, we are going to look at how to actually play the missions, because it isn't quite the same as 40k, and I'm going to explain why. There are some subtle differences, but mostly the confusion lies in how units score/are able to score, and I want to shed some light on this.

Deployment Types:

First off, I want to go in to deployment types. In the Horus Heresy, the missions have 6 different deployment types. Sometimes these are specifically stated in the mission, other times they are randomly rolled for. These deployments, measurements and such are all aimed at the 2500-3000 point per side game, and as such they use the 6x4 table and corresponding measurements.


An Example Mission:

This mission is from Book V: Tempest (Word Bearers vs Ultramarines at Calth). The points of note are as follows:

-The armies selected are to use the Battles in the age of Darkness rules and FOC's. This means that you cannot bring over bizarre rules from 40k, except where stated expressly.
-The deployment type is random in this mission, selected as per the previous six options listed above.
-The terrain is placed/
-The warlord traits and psychic abilities are rolled, then the players roll off to see who will deploy first (and take first turn).

However...


You want to understand the mission prior to deployment. This mission has several special rules, namely Night Fighting and Reserves (as per 40k) but also Heavy Armour (a Heresy special rule for this mission, which makes all vehicles with the Tank type, as well as Super-Heavy Vehicles and Walkers SCORING UNITS). Now the fact that the available scoring units most likely increased for both players will change how they play the mission.

As per 40k, there are Secondary Objectives, however, these are specifically listed in the mission, in this case, Slay the Warlord and Last Man Standing. This means there is no Linebreaker, no First Blood etc. in this mission.

From here, the mission is set up and played out as per the objectives for the mission. From this point on, it will play out identically to 40k.

Notes On 40K Missions In 30k:

In 30k, only Troops and units specifically listed as scoring, are actually scoring. The Obj. secured rule only applies to these units, not to their transports, or any other units. This limits the amount of scoring, and can make some missions incredibly more difficult than for a similar 40k army. For example, a Maelstrom of War mission will severely handicap the average Heresy force, with most only averaging 3-4 scoring units below 2000 points.

As for the missions themselves, I personally prefer to ignore them in favour of the 30k missions, as they are more interesting and are designed to link together in order to form a larger narrative (for example, you can literally play from the start of the Istvaan V massacre all the way through to a skirmish level game involving the surviving loyalists tackling the traitors and all the way into the Last Stand of the Raven Guard before their rescue, needing around 18 missions to play out in full!).

Conclusion:

Although not a lengthy article, I felt it was important to demonstrate to the community how 30k deviates from 40k, and where the two systems can potentially clash. This isn't designed to demonise 40k, just to let people know the perils of cross-system gameplay. At the end of the day, play what you like, in fact, I would house-rule it so that 40k units had to score the same as a 30k army, in order to balance it out a little, but that's just me...

~Macca

Tuesday, 8 September 2015

Fear the Reaver!!!


Gday Guys, Keepy here.

In recent times some of our other authors have written about legion specific Rites of War or units, and a few of you have requested something on Sons of Horus. As the resident player of the mighty XVI, I am more than happy to give you some thoughts of mine.

I am still play testing and getting my head around a competitive army for the Sons of Horus Rite of War, The Black Reaving, so I will leave this for now. What I have been playing with much success are the Reaver Attack Squads. I have never really used them much until recently, and I think I have found a few guidelines (albeit expensive ones) on how to use them.

Reaver Attack Squad Basics


To start with, lets have a look at the unit itself. A Reaver Attack Squad costs 135pts base for a unit of 5 models, including a Chieftain (Sergeant) with the option of taking up to ten more models for 15pts each, taking up a Fast Attack slot. The stat lines are nothing to write home about, fours across the board with the exception of attacks, two base for a Reaver and three base for a Chieftain. These stats are pretty much on par with a Legion Veteran Tactical Squad, again with exception to the Chieftain. They come equiped with Power Armour, Bolt Pistols, Chainswords / Combat Blades, Frag and Krak Grenades.


The Reavers also come with some pretty handy special rules, Assassin's Eye and Outflank, on top of the usual Legion Astartes (Sons of Horus). Assassin's Eye gives the entire unit Precision Shot and Precision Strike despite not being characters, very handy for getting rid of that Sergeant or Apothecary before laying into your target unit. As long as the Reaver unit is not equipped with Jump Packs, it may also take a Rhino or an Anvillus Pattern Dreadclaw as a dedicated transport.

So we have some handy rules and a couple of transport options for an otherwise mediocre stat-lined unit. What makes these guys any good?

Sunday, 6 September 2015

Iron Warriors Rite of War: Hammer of Olympia

Macca here, and today I want to talk about the Iron Warriors and their Rite of War, The Hammer of Olympia. I will preface this by saying that this is one of the BEST Rites of War, as the negatives are almost all positives.

So, where do I begin?

Legion Special Rules
  • The Bitter End: Your opponent (not you) may force full 6 game turns rather than rolling for random length. Just like the Imperial Fists.
  • Wrack and Ruin: Iron Warriors do not suffer morale tests from shooting attacks and may re-roll failed Pinning tests. All grenades and melta bombs gain Wrecker.
These rules are HUGE. The ability to ignore morale from shooting casualties and re-roll pinning makes the Iron Warriors formidable at holding objectives. Nothing short of their annihilation will move them off an objective. At Inferno III, one tactical squad suffered the sustained firepower of half a mechanicum force and endured for 3 turns on top of an objective in cover, scoring me precious Victory Points.

Legion Unique HQ

Warsmith: A free Praetor upgrade that forces him to be the Warlord if Perturabo isn't around and gives an extra VP if slain. In exchange, it gains Stubborn and gives up a Warlord trait for Shatter Defenses (lower a chosen terrain piece's cover save by 1). Can't use a Jump pack, Bike or Jetbike, but can be upgraded with Battlesmith + Servo-arm combo for 35 points.


Rite of War: The Hammer of Olympia - Masters of siege warfare and attrition tactics, the Iron Warriors favour the use of murderous firepower as their principal agency of war, and are renowned for their use of heavy armour and fortifications, spurning vainglorious ideals of personal combat and valour for the brutal determiation to achieve victory by any means necessary. this culminated in tactical formations such as that which became known as the Hammer of Olympia; designed to carry out an unyielding close range attack and shatter the strongest enemy defence line under a weight of armoured warriors and hurricane of fire.
  • Hail Of Fire: After firing a Rapid Fire weapon, a unit with the Legiones Astartes (Iron Warriors) rule may declare an assault as long as they haven't used Fury of the Legion, counting as a Disorganized Charge. I love this tactic, you can shoot a unit, hitting them on 3's and wounding (generally) on 4+ whilst if you charged, you would only get 4's to hit. Also, 2 bolter shots is better than 1 bonus charging attack, and if you can wear your enemy down before charging them, you'll do better in the long run (especially against Raptors or Reavers who gain bonuses for outnumbering in assault). Bonus points if you rapid fire plasma guns from a tactical support squad and then charge...
  • Sheathed in Steel: All Tanks and Walkers gain Extra Armor for free. Not only does this save points, but since some walkers can't take extra armour, it's even better. The best thing here is that you're getting an upgrade which is normally seen as "a good choice but maybe a waste of points", but since it's free it's excellent.
  • Siege Engineers: Can take an additional Heavy Support choice, which is freaking fantastic. Seriously, 4 heavy support options? In a big game, that's a Basilisk/Medusa Squadron, a Deredeo and a pair of Sicarians, just waiting to fire ALL THE DAKKA.

    Restrictions:
  • A Warsmith or Siege Breaker must be used as compulsory HQ choice - A Warsmith is awesome if the enemy is taking fortifications, and the option of a cortex controller opens up Castellax, Thallax, Vorax etc. as an optional Heavy Support option. Yes, you want to have a unit of darkfire cannon armed Castellax manning your Aegis line. Also, a Warsmith shattering enemy defences is always desireable.
    The Siege Breaker is a great option as he allows your Medusa Squadron to take phosphex shells, and he grants Wrecker and Tank Hunter to the ranged attacks of any unit he joins. I suggest attaching him to Siege Tyrants
    .
  • Must take more Heavy Support units than Fast Attack units. As they say on 1D4Chan: "If you think this is a penalty then you shouldn't be playing Iron Warriors. Also, doesn't matter since you get 4 heavy slots. If you wanted lots of flyers remember Caestii, Fire Raptors and Kharybdii are HS too. If you took a normal Praetor, mount him in a jetbike along his Command squad (who use 0 slots), take Shrapnel Bolts and go make up for the lost Fast Attack choice."
  • Must take an additional compulsory Troops choice. If you have Erasmus Golg in your force, this could be a Terminator squad, freeing up precious elite slots for more Siege Tyrants, Rapiers and Contemptors.
  • Cannot take an allied SPACE MARINE LEGION detachment. Meh. You don't need them, worst case, take some Mechanicum allies, and laugh because you have cortex controllers, a Praevian and your army is now more machine than man, twisted and evil.
 

Macca's evil ideas:

So, you know you want to take an army big on firepower. Naturally, since you lack in melee, (except against buildings, seriously, melta bombs with wrecker is PLUS THREE to damage against fortifications!) you want to exploit your superior firepower to Tau like levels. I suggest using a unit of Siege Tyrants with a Siege Breaker attached, for maximum effectiveness, and two units of rapiers; one with graviton cannons and one with heavy bolters running shrapnel bolts. the idea here is simple, Grav Rapiers will screw any vehicle, and the leftover difficult/dangerous patch will bog down heavy infantry (especially Cataphractii type units who cannot run), the Tyrants will mince anything weaker than a Knight Titan, and the Heavy Bolters will fire 24 twin-linked S5 AP5 shots per turn with PINNING. You're a fool if you don't use that in an era with little pinning defence. (not good against Mechanicum or Death Guard, but, meh, chose your battles my young grasshopper, that's why you have Tyrants and 4 heavy choices...)

Which brings me to my next point... Heavy Support. I have suggestions, and they are:

-Predator Squadron with plasma exterminators, for killing heavy infantry,
-Sicarian Battle Tanks, for modest anti-air and excellent anti-skimmer and light armour destruction,
-Sicarian Venators, for when you really REALLY want to kill enemy armour (do note, don't use lascannon sponsons, since the main gun is ordnance, you're better off taking heavy bolters, which instead of two snap-fire lascannons will give you 3 separate heavy bolters if enemy infantry are too close. Bonus points for selecting Shrapnel Bolts for pinning),
-Deredeo, because there is NOTHING better for Anti-Air. (In a pinch, take one with an Atomantic Pavise and stick him with your Siege Tyrants giving them a 2+3++ invul save. Sure, you lose the missiles, which do wreck Rhinos and Fliers, but 2+3++ Tyrants is just pure evil);
-Legion Basilisk/Medusa Squadron. You only get one, so choose wisely.

I hear the voices in my head, "kill them all.."
Uh, no, not those voices, these ones: "Why no spartans for rushing Golg and Terminators up the table?"

Well, because our terminators aren't as strong as enemy terminators in many cases, and due to all the points you have spent on Heavy slots already, you won't be sending much up the battlefield. Instead, I suggest focusing on using your excellent firepower to get the job done. As for actually sending units up the table, Tactical Squads in Rhinos (with their free extra armour) are a great choice, and if the Primarch Perturabo is in the army, you can deep strike terminators anyway, and if your game is big enough, you can take the Tormentor, and you can add all that firepower plus the transport ability to the force.


Fortifications:

If you are taking Kyr Vhalen, you will WANT to take fortifications (he is also a Warsmith, so automatically fulfills two criteria for the Rite of War, as a Master of the Legion and a Warsmith). Kyr will give +1 ballistic skill to a unit of your choice and/or give you +1 to your cover save for one fortification. I suggest a Bastion, Bunker, Aegis Defence Line, or if you're a true bastard, a Plasma Obliterator or Void Shield array.

Really, fortifications are quite optional, but an Aegis line with +1 cover save in front of all your armour is going to make people weep, especially when they realise that they need to kill whole units off for them to no longer threaten objectives. Gotta love that 'no morale against shooting'.


In summary, this is how to use the Rite of War: BUCKETS OF BULLETS!!!

If you want more information on the Iron Warriors in general, check out the episode I guest appeared on of the Eye of Horus Podcast here.

~Macca

Wednesday, 5 August 2015

A Galaxy In Flames Battle Report: Inferno III Round 3 Iron Hands vs Iron Warriors

So, as promised, here is the second battle report from Inferno III, this time between the Iron Warriors, and Age of Darkness' Nate. This was the 3rd and final game, and despite having known each other for years, it was the first game we ever played against one another.

The setup was simple, Dawn of War deployment, kill points, 2VP per infantry unit, 1VP per vehicle, with the standard secondaries, as well as bonus VP's for the player with the most units left alive at the end of the game. Nate won the deployment, however, his Force Org chart forced him to take second turn, so no seize roll was required.


Due to a lack of enclosed tables, we played on a relatively open table. With the Iron Warriors on the offensive, poor Nate proceeded to be violated, repeatedly, and without lube. The Graviton Cannon Rapier battery proved throughout the tournament to be an ungodly powerful AT platform. Once combined with the Tyrants and the Deredeo, well, turn one saw the loss of 2 Sicarians and 2 hull points from a Predator before Nate even could retaliate.


Nate's turn one consisted of moving his remaining armour into positions where he could draw a good LOS to my RAPEier batteries (no political correctness here, these guns were committing a crime), as well as crying into a small cup as half of his firepower was already dead.

He fired his Cerberus Super Heavy (crewed by Castramen Orth!) into the Contemptors, and where possible, any spare shots were channeled into the Rapiers.


Turn 2 for the Iron Warriors saw a full 5-model Vorax unit led by a praevian, all with tank hunter, move on from the right flank. The Gravitons finished off almost all of the armour on the left flank before proceeding to swivel towards the right flank as the Tyrants advanced (spewing an ungodly amount of frag missiles all the while).

Turn 2 for Nate saw him trying to kill the Graviton cannon rapiers, as well as targeting the Vorax with whatever shooting he had, backed by a Gorgon Terminator charge.


Sadly, as turn 2 was ending, the Gorgons charged the Vorax, and despite having to make only 5 invuls, Nate managed to fail all 5 in an excellent display of dice rolling (Danny and I have begged him to burn those dice numerous times), meaning that the Gorgons died without causing any damage.


Turn 3 saw the Vorax take out the Spartan, and the Gravitons destroyed Orth's superheavy, which ironically blew up and killed 7 out of 10 members of one of the Iron Warriors tac squads and netting Nate more kills in that explosion than in the whole match thus far... For Nate's turn 3, he tried to shoot down the Vorax and repositioned his Sicarian Venator to shoot the Tyrants, as well as castling up with his surviving armour.


By turn 4, the Iron Warrior Siege Tyrants had reached the back lines, and it was all but over. The rest of turn 4 and 5 was spent mopping up the remaining Iron Hands and taking the last hull points off the Sicarian Venator.


Nate, I'm so sorry. So very, very sorry.

We joked at the time that I would have to censor every photo of the game as the images were 'too graphic' to be shown. This was the unfortunate result of matching up a defensive anti-tank force (Iron Warriors) against a mechanised armoured company. I for one blame the Loyalist General for the match up, Tim from the Eye of Horus!

All of this aside, Nate and I had a good laugh, and it was a really relaxed game, we basically knew after turn one that it was over so we weren't playing for sheep stations. It was one of those games where we just let the other player tally up the wounds on their own units from blast templates, and overall we mostly just sat around all game talking smack. It's a shame that we couldn't play on a table which had a far more dense terrain setup, however being assigned our game late in the round meant all the tables were taken which we wanted. On the bright side, this has lead to four days of the traitors making jokes about loyalist tears, with Danny managing to make loyalist after loyalist cry for 3 tournaments (ask him about his "Toughness zero list", go on, I dare you). Also, I got a lift to the event with Nate, so needless to say, I wasn't offered a lift home :P

Thanks for the game Nate, next time out, we'll make it a balanced one.


~Macca

Thursday, 5 June 2014

Setting up a battlefield for 7th Edition.

Today, we are going to look at setting up a gaming table in 7th edition. The post is a little bit wordy, but I have added a bunch of home graphics to demonstrate the points I am making along the way. This is actually really simple, but often seems more difficult then it appears thanks to inept set up. I think we have all had horrible games against Tau and Eldar players on near-open tables. So, lets go through my process step by step.

The types of terrain:

We have multiple terrain types, some of which overlap.

-Open Terrain
-Buildings
-Ruins
-Difficult Terrain
-Dangerous Terrain
-Impassable Terrain
-Battlefield Debris
-Walls and Barricades
-Comms Relays
-Defence Lines
-Gun Emplacements
-Craters
-Imperial Statuary
-Rubble
-Tangle Wire
-Tank Traps

So, basically, a lot of options here. I like to break down most cover into the amount of area it covers, and the general theme of a table.

Basic themes are:

-Grassland (Tau Shooting Arena)
-Snow Fields
-Lava Fields
-Desert Wasteland
-Mountain Pass
-Urban Rubble
-Woodlands

Games Workshop itself defines the battlefield as: "The battlefield is usually a flat surface on which scenery models are placed and over which the armies fight. The battlefield can be of any size from 2' by 2' upwards. We recommend that it not be more than 6’ wide at any point, as tables that are wider than this can limit the ability of players to reach models in the centre of the battlefield. Battlefields are most often rectangular in shape, but can be square, round, L-shaped, or whatever other configuration is agreed upon. A Realm of Battle board makes an excellent battlefield, but a typical dining table will suffice. The battlefield is considered to be ‘open ground’ for all rules purposes. A unit cannot voluntarily move or be placed beyond the table edge unless it, or the mission you are
playing, has rules that specifically say it can choose to leave the battlefield."

So, basically, it can be any shape and is open until you put terrain on it, and you can't leave it. Cool. Lets use this as the basis of our 'Digital Table'.

The Digital Table:

Notice how I didn't pick an L-shaped table...

Here we have the table, a 6' by 4' table. Seeing as it's a grassy table, I think that a 'Woodland Theme' is the way to go. So, with the advent of 7th Ed, the old 6th ed System of placing terrain is gone and has been replaced by the new 'do whatever you like' system, which I am sure will generate some great arguments between Tau and Nid players in 40k. Today we are going to avoid this problem by keeping it simple and following a few principles.

No. 1: LOS Blocking.

We want to have a few objects placed centrally which block Line of Sight (LOS, get used to it, I use this a lot through the article). These can be anything from dense woods to rocky outcrops. The idea behind large LOS blocking objects is that we don't want someone to place their ranged firepower in such a way that they can completely dominate the battle with little effort. Sometimes, this is unavoidable, but generally, a few big objects will do the trick.

Marine shown for scale purposes. Marines do not make good terrain.


Here we have something which is ideal, you can see the scale of it, so lets place it on our board. I am going to use three of these.


No. 2: Assorted Semi-LOS Blocking.

This is stuff like forests, rocks, maybe a few barricades. We want to further block Line of Sight using these, but not to such a degree that you cannot see through it. This is important as it stops a lot of the mid-range firepower which causes the majority of damage. The last thing you want is to emerge from cover in your turn one only to be decimated in the open. This terrain gives you a fighting chance.

Citadel Forest.

Now, lets place these on our board. As you can see, there are more of them, and these take up that little bit more room, restricting Line of Sight a little bit more.


No. 3: Minor Terrain.

This is just things like barricades, more open woods and craters. This sort of terrain offers very little cover, but it helps to close up large open areas. I find it quite fun as players who end up in each others territory can use it to their advantage, such as forcing enemies to charge through difficult terrain to reach them.

Citadel Battlefield Debris


With this added, we now have a fully set up Digital Table.


Ideally, we are keeping 1-3 terrain pieces per 2'x2' section, not including overlap. As this is a woodland table, I have chosen not to use barricades, however these could be used to add a few more bits of cover in the larger patches. We now have a combination of:


As you can see, the final design suits all three main deployment types, Dawn of War, Hammer and Anvil and Vanguard, as the terrain is not weighted in any one direction. I have seen tables that look like Omaha Beach from the start of Saving Private Ryan, nobody wants to be in open ground whilst the other guy gets to deploy in a fortified bunker complex do they?

A further point of note with this type of table is that it leaves plenty of areas where fortifications may be set up, if they have been purchased by either side. The large LOS blocking terrain will still effectively hamper most fortifications, with units placed on top of the Fortress of Redemption or the Bastion possibly able to draw LOS, but the vast majority of units will not.

Here is an example of a gaming setup that Cat and I were using in late 6th. Note that the terrain is not weighted overly to any one side, with 3 large structures all located in the centre of the table, and only a single large structure at one end, balanced out by multiple barricades at the other end of the table. (Note the craters placed to denote blown up vehicles, something 7th has decided to dump. I kinda miss this.)


This is a simple example of a gaming table, and I just pulled it from one of my picture folders for demonstration purposes. You don't need a lot to make a nice gaming table, just a painted 6'x4' board, and a few bits of painted terrain and you can do amazing things. We will of course go into building the actual terrain for tables from start to finish in later articles.

Well, that's it for now, my state-of-the-art paint based graphics have hopefully demonstrated the basics, and we WILL expand upon this in future articles. Until next time,

~Macca

Wednesday, 2 April 2014

Macca on Tactica: dealing with big baddies Part: 1

So, my previous posts have delved into list building and balance in the 30k/40k environment. It's time to look into actual tactics today.

Dealing with big baddies: Mechanicum Castellax.

Here's one of Keepy's Castellax (aka, that jerk Billy)

So, what are we dealing with first off? Lower weapon skill then a legionnaire, strength of 6, toughness of 7, 4 wounds, a monstrous creature, atomantic shielding and a 3 up armour save on a sesame seed bun. These guys are also packing heat, with a mauler pattern bolt cannon, and a pair of boltguns, which you can upgrade to flamers for cheap. The mauler also can be exchanged for a Darkfire cannon or a multi-melta. The kicker: each of these bad boys is under 100 points.

What does this mean for the average Legion player? Well, you can get 20 tactical marines for the cost of 3 of these guys fully upgraded. They are pumping out shots that hit on 3's and kill on 2's. So lets look at the math on shooting in a flat one-on-one scenario:

Castellax output: 3 castellax fire @24" 9 shots, you get 6 hits, and of that 5 kills on power armour, with the associated pinning check.

Tactical Squad output: 20 marines fire @24" 20 shots, you get about 15 hits, and of that you'll cause 2 wounds, which the castellax get a save against. @12" you can increase to 4 wounds, and with fury of the Legion, you can get 8.

Those are not great odds. So how do you kill that which has no life?


Well, there is a quick way to cause casualties, and I call him gamblor! Wait, no, I call him a Librarian with the Telepathy Primaris, Psychic Shriek. He gets to roll 3D6 and subtracts the target's leadership. The difference between the two is the number of wounds caused, WITH NO ARMOUR SAVES ALLOWED!. If you cast this power once, you can kill one, and half kill another, with averages. The down-side is you have to be within 12" to get it off. So what do you plan for at this range? I personally would be running the Librarian with a force sword and a 9 man tactical veteran squad. I'd be hoping to get dominate, invisibility or hallucination. If you can cast any combination of these, you can really hurt them. The Castellax only have 2 attacks each, but they have 2 flamers each which can be nasty on the charge. By using Hallucination, you can cause them to strike one another, or stand there drooling (if a Castellax can even drool?), and Dominate gives you an almost 50% of having them fail in their attempts to overwatch. I would then charge with the marines and the Librarian. In round one, you want to use your superior attacks to cause the casualties, and if you have the warp charge, you would force weapon the castellax to death. I cannot stress enough, you CANNOT let them charge you.

So, how do you get into a position to hit these guys?

Well, cover is the big one here. The Castellax are shortasses, as far as Monstrous Creatures go. Even a Rhino can hide you from their line of sight, if you use it wisely. A Land Raider is excellent against these guys, because although they can hurt it in close combat, if it's upgraded with ceramite, not even their multi-meltas can penetrate it. It is the perfect platform for your Librarian and his escorting squad. A further point to note with cover, is that the Castellax lack assault grenades, so if they attempt to attack through cover, power fists and the such can strike against them in a timely fashion.

What if I don't have a spare Librarian?

That's not the worst thing in the world. Units such as Legion destroyers with Rad Missiles can take down Castellax fast, provided they don't take too many casualties. Their small blast attacks wound on 2's, and for every wound caused on a multiple wound model causes it to lose a point of toughness. 2 wounds and they are toughness 5, easy to pick off with bolters at that point.

Another option to consider is a Mortis Contemptor with twin Kheres Assault Cannons. The shooting from a single dread should kill one Castellax per turn, thanks to the buckets of bullets they can dump down range.

These are my choices, I nominated the Librarian as the primary choice, as it is a very common HQ due to the massive buffs/debuffs he can grant. I have used this model a fair bit myself, and I have a lot of faith in this combination. This isn't to say that it's the only way, nor the easiest to deal with these bad boys, but this is how you have to think when you go into a tournament and your list isn't optimised to kill mechanicum. You have to think on your toes, and you have to think fast.

My final piece of advice is this: don't let their models determine how you play the game, let the mission determine it.

Friday, 14 February 2014

A Galaxy In Flames Tutorial: Sponge Weathering on Light/Dark Vehicles.

Today we pick up where we left off yesterday. The tank hull from the Rhino we have been using for out tutorials on Oil Paints is the same hull being used for the weathering tutorial. In this tutorial, we will cover the use of the 'sponging' technique for weathering/battle damaging vehicles.

I have chosen to focus on light grey and black, as these are a great starting point. Green, red and blue will feature in my next sponge tutorial.


To start off with, we have a small selection of parts and paints required. I have chosen to use a couple of different paints, but the brand isn't too important, they are just here for demonstration purposes.


 Ok, so here is a bit of sponge I have torn off. It is important that you have a rough edge, as a flat surface will leave a flat pattern. We want a rough, inconsistent texture to be applied by the sponge, as it is more organic then a set of identical marks.


 The first layer applied is a small black layer. I am using black as it contrasts heavily with the white/grey hull. We want to start dark on a light hull, and work our way down to a light colour, and then we want to do the opposite with the dark hull, that is, working from light to dark.

It is important to not place the black on too heavily, as the black will quickly overpower the grey hull.


 The second layer uses a dark grey. this is the main weathering layer, and is used to place the majority of damage. With a vehicle, the forward hull will suffer greater damage, so I have sponged slightly heavier on the front of the exhaust and sloping front portions of the hull.


Finally, I have used a very light grey to apply small chips onto a couple of areas and plate edges. The light grey will help to break up the darker colours beneath.


 With the black hull, I have used the light grey first. Again, this is for contrast, and should not overpower the base colour.


 The dark grey has now been sponged over the light grey, diluting the lighter tones and giving a more natural feel.


 Finally, a very light black sponging has been done over the previous colours. This helps to further break up the hull, allowing for a more mottled colour pattern.


So here you have it, the finished hull halves. I have not weathered the side hatch, as I had glued it in place earlier, but I will attempt to make up for this in the next tutorials.

 Also, I would like to apologize for the glossy sheen on the hull, the gloss varnish applied earlier to seal the oils is reflecting the light no matter what angle I lay the hull at.

Thursday, 13 February 2014

A Galaxy In Flames Tutorial: Working With Oils- Part 2

Hello, Macca here with Part 2 on the use of oils. This time out, we will cove the use of oils in weathering applications.


So, to get started, we are using all the same kit we used in the first tutorial. I have also decided to show the collection of oil paints I am using in this tutorial, as well as the test hull.


So here I am showing the No.2 medium. I am using the No.2 as it will stay liquid for longer. Normally, oil mediums will take a day to dry, however, the medium has a tendency to become 'gummy' after about 5-10 minutes. Keep this in mind when you mix oils, that you may have to re-thin them using either more medium, or artists turpentine.


Here are the colours I have mixed. The green/brown is an oily type colour, ideal for use on the grey hull as it will contrast nicely with the light grey tone. The yellow/white is for use on the black hull as a dust effect. I then mixed it again with more white (not shown) for the rivets.


I then placed the washes all around the rivets and hull plate edges, making sure to not place too much or letting it pool.


 So this is what you have with the oils applied. The rivets are clearly defined, and a thin line can be seen around the hull plates.


At this point, we wait for the oil to gum up. I thin get a very CLEAN brush. This brush is then moistened in artists turpentine. The brush is used to gently stroke away from the rivet. The turpentine breaks the gum effect, and allows the oil to streak. This is one of two ways this can be done. The other way (not shown) is to place a drop of undiluted oil at a point, then to spread it using the same method. I do not favour this method as it is less predictable and can be too stark a contrast. I have mentioned it as something to keep in mind if you want to try it.


So here is our black hull. You can see the glossy sheen around the panels from the medium, but this won't be visible after the oil wash has been sealed with varnish, as it is merely a clear run-off.


Here is the grey hull, with oil stains leaking from the rivets.


This is the hull from a distance. I will be utilising this same hull in a future tutorial detailing weathering on light and dark hulls. Below are alternate views of the oils.


Well, that's all for now, I hope you have picked up something. As always, feel free to comment/discuss below.