Hello people of the wider universe we call the internet. My name is Brado aka Dice Wizard and I have been invited to join the crew here at AGIF. I have been hanging around a couple of members of the AGIF crew for a little while and have been mentioned in some of their posts mainly about lists and certain tactics I have used (jet bikes with librarian and medicare for one). I plan to bring my little bit of knowledge on how I use certain units and lists to get the most out of them, but first I guess a little about me.
I am a mad keen tabletop RPG player, at one stage I was playing 3 times a week just to get my fix. Have been playing for over 10 years and have loved the many different experiences and situations I have been in. Now I still play tabletop RPG and also 30k. Keepy introduced me to the 30k universe with a proxy game. That one game got me hooked on the rules, units and the fluff because who doesn't like a good story. Since I had the RPG background I looked to the units that I thought are a stand out in the legion list and started to see what I believed to be a strong list for an up coming tournament. This list was built around the White Scars way of fighting, so fast and fierce with plenty of fire power behind it. So the research began into what units could do what and how they would all work together. This has lead me to look into many other units strengths and weaknesses so that I could counter and or abuse them.
Currently I have moved on from marines and have started a Solar Auxilia army. I haven't started even prepping what I have so keep an eye out, since I am going out of my way to learn some new painting techniques to see if it will make my current painting ability better.
So onto one of my favourite things and that is tactics for the different units out there for the legion list.
The first vehicle I am going to explain tactics and uses of is the humble rhino transports. This tank is highly underrated in my area as it "always" gives first blood. I don't believe that it "always" gives first blood because if they are used properly they should be an annoyance through most of the game. So onto the first of many tactics I like to use with rhinos.
Rhino Tactic 1. Creeping/Moving Wall
While running 2 rhinos (even numbers work best with this strategy) you move them forward and use them as a portable wall for your infantry. This was a tactic during 5th Ed I was told, didnt play so don't know, using the rhinos to go "butt to butt" and piling out your troops behind if needed. If there is no cover for your rhinos while doing this is the early turns pop smoke in your shooting phase to give them a roll against attacks. Remember this is now a safety blocker for your marines that have just popped out the back from many anti infantry guns, except barrage.
The next step in this Tactic is opening up, straight apart, the rhinos to allow your marines a clear shot at any infantry, if tactical, or even tanks with a support unit. With the rhinos apart turn them both around to face each other. Shoot the marines first then have both rhinos go flat out and close again giving your marines cover again.
You can also use the rhinos to creep up the table with marines out the back. This is done very much in the same way as before, except that you move them forward 6" then have them face each other with the marines moving up to see between the gap and then once again flat out rhinos close.
This can also be adapted to protect your assault marines to get across the board without suffering too many casualties before they make close combat.
Rhino Tactic 2. Objective blocker.
Another use for your rhinos is to block off objectives. Once again you are going to be using your rhino as cover for your marines. Ideally you want to block off line of site to your marines holding an objective to give them a good staying power as well as cover on a side they don't have without it.
This tactic is very simple to setup as well. First look at the layout of objectives and also how your opponent has deployed, this will govern where you set up the wall block. Once you have selected an objective to take with your rhino squad I like to charge for it so that I can then bunker down and hold. I find most of the time if you use cover you can go 18" in a turn and be on an objective first turn. With this objective held you can use the rest of your firepower to protect or remove the opponents forces so that the objective is too much of a nuisance to get.
An add on to this tactic is to allow your marines to shoot on your phase and have the rhino play as moving cover again. This just means you will reverse your rhino to open a fire arc allow marines to fire then go flat out and form the blocker again.
Rhino Tactic 3. Hull down Tanks and Dreadnoughts.
This just uses the rhino to give your more dedicated shooting tanks a cover save using the rhino on the required side. In some cases this removes one of the weapon system on the tank such as a Sicaran's heavy bolter. Other tanks get the full benefit such as predator tanks since they are built on a rhino frame. This tactic can allow your tanks to get a mobile piece of cover to help them live longer but also can defend them from possible charges due to the rhino being on the required side.
These simple tactics can be of use to some and not to others. Also these are only a few tactics I have used and learnt of the years. There are also many others out there and if you have any that I haven't mentioned leave a comment and I will try my best to incorporate it into what series of tactics.
Also thanks to Wadey for a lend of the models and Keepy for use of his amazing table.
Cheers again guys,
Brado (Dice Wizard)
Monday, 9 March 2015
Saturday, 7 March 2015
The Iron Without: Tyrant Siege Terminators Part 2
So, part 2. This was a very fun project, which I literally smashed out in two afternoons. Normally I wouldn't paint so fast, but I was REALLY keen to get these guys done. They are only to a table-top standard, but I'm pretty happy anyway, and I can always go back and add some more details at a later date.
So, on with the show huh?
I have used the minotaur symbol again, on the left side of the Cyclones and on the right knee pad. The Minotaur guarded the Labyrinth of King Minos, now these Minotaurs guard Perturabo's. I also did quite a bit of chipping and weathering on the hazard stipes, as I think it suits them being more damaged as line troops.
Again, with markings I have the IVth Legion marking on the right hand side of the cyclone. The old decals I used for this did not apply as crisp as new ones, possibly as the material is thicker. In any case, it was a disappointment to me. I won't hide it because it is what it is.
Now, we get to the snow effects. The rock on this base is actually cork. I used the method which Toby highlighted in his tutorial to create them. Find that one here.
As for the snow effects themselves, I used some Secret Weapon products, and Mr Justin himself gave me a few pointers as I had not worked with this product before (props to him for taking the time to chat with a nobody when he is busy running a business). Overall, I'm VERY happy with the snow, as I want a slushy eve-of-spring look. His video tutorial on this effect can be found here, and the product itself here, for those who are curious. I do highly recommend this, as the results I got were easy to achieve and look pretty good for a first-time out.
Lastly, here's a pic of the Siege Master's 'smart bolter', representing his omni-scope. I do apologise for the dark photo, in person the screen is a grey-blue and the lines on it are near-white. As it's overcast here, I have failed spectacularly with my camera to capture the image. (Until my new macro lens arrives for my good camera in the next week or two.)
So, what do you think? Let me know if you like or dislike my 10-hour Tyrant painting efforts,
~Macca
Thursday, 5 March 2015
The Iron Within: Tyrant Siege Terminators Part 1
Greetings folks! Macca here with an update on the Iron Warriors, but first, some quick info.
I'm moving! Yes, as my partner has got a new job, her and I are moving to sunny old Ballarat. This is where I chime in and say 'winter is coming'. As a result, I have had to downsize my far-too-large collection, and unfortunately, the Raven Guard have bit the bullet. They were one of the first posts to grace this blog, but they will now find a better home.
Well, anyway, no sooner did I sell those then I brought this next project! Oh, you can only imagine the kind words from my girlfriend when she found out. Needless to say, it ended well haha. Well, the original owner wanted to move ahead with another project, so I brought these off him.....
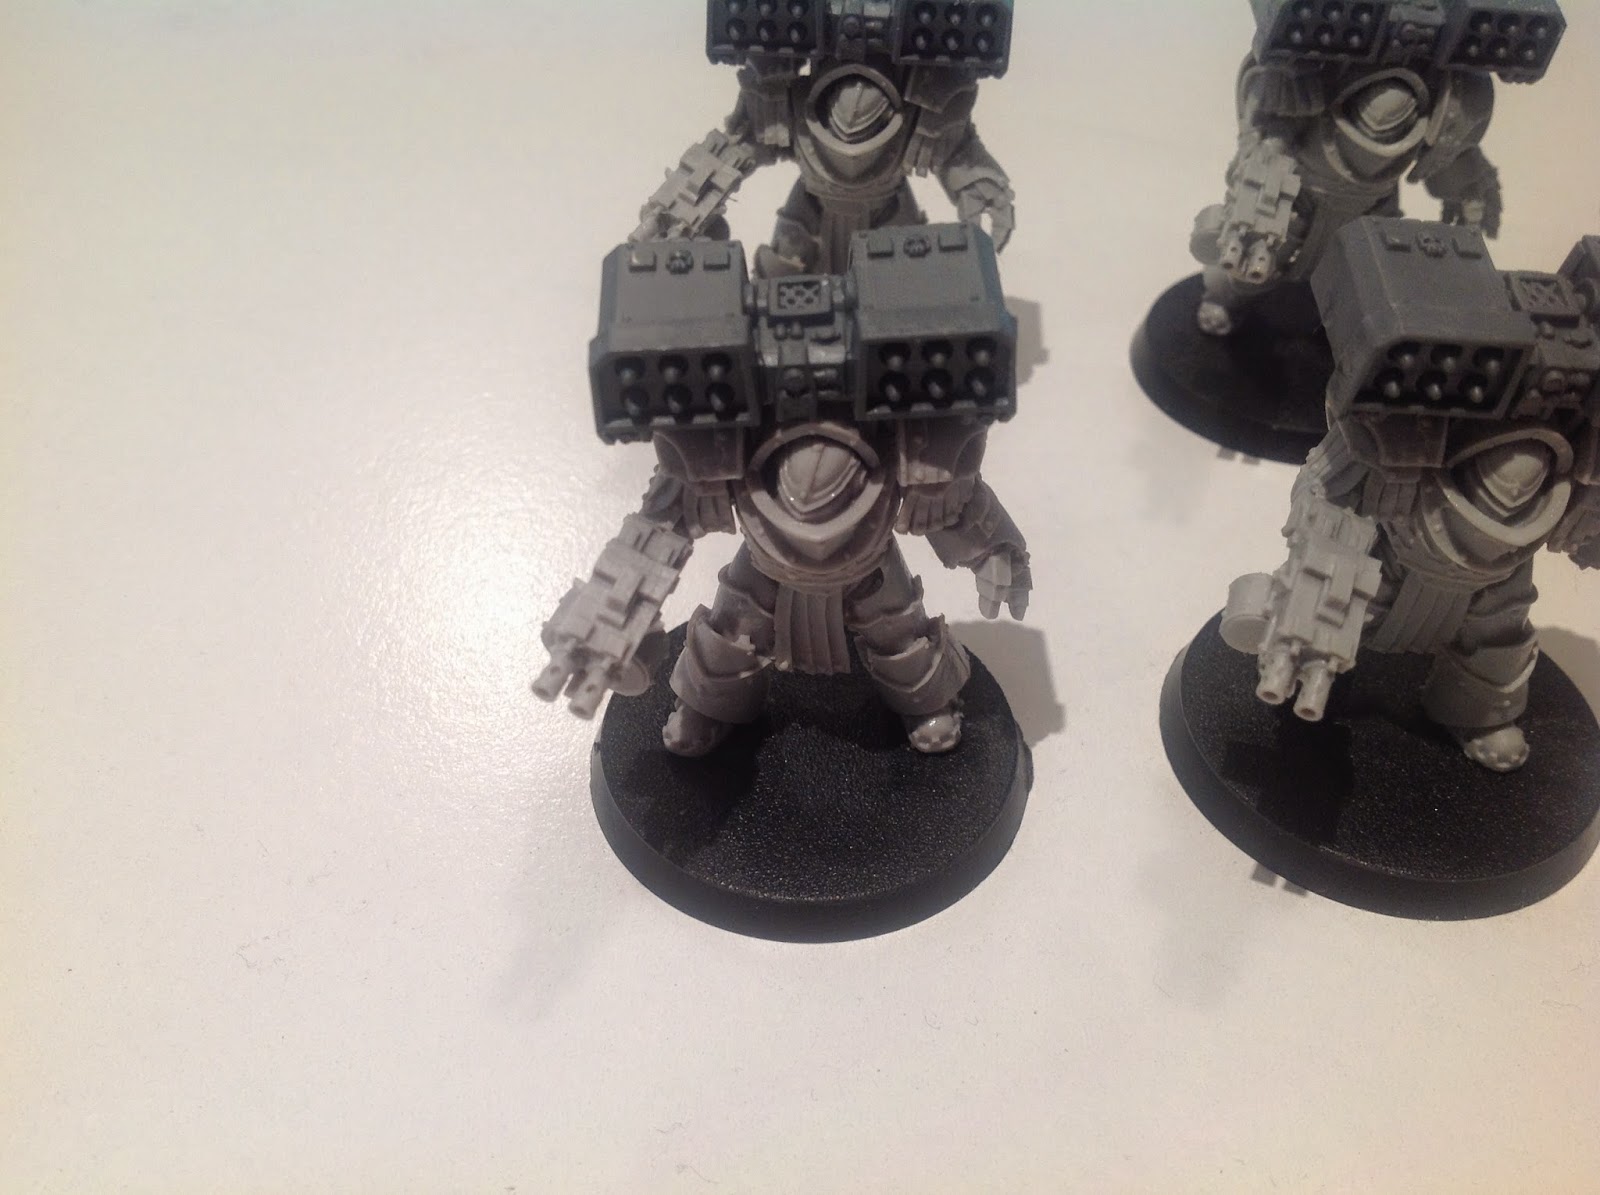
Ten brand new, freshly converted Cataphractii Terminators, complete with plastic cyclones. I had to spend the first hour or so on them just cleaning up mold lines and sprue attachment points, but overall, I'm super pleased with the purchase, as I had been procrastinating about this unit for a long time.
So, what was lacking? Well, a leader. A Sergeant. A siege master. Yes, the Tyrant Termies are led by a guy calling himself the siege master, in a rather subtle way. He is basically exactly the same loadout wise, but has split-fire thanks to an omniscope. The question was, how do I make a plain guy stand out?
Hmmmmm.........
I didn't want to remove the helmet, he's a terminator, and Iron Warriors are smart enough to cover up... mostly. Perhaps some plastic shields, or some chains? Sigh, sprue after sprue yielded nothing I was happy with. But then, I had an idea....
What if I took the look of my Iron Havok Sergeant and combined it with the terminator? Would I get some horrible amalgamation, or inspiration?
So what stands out about the sergeant? Ok, he has servo skulls, that's kinda mechanicumish, so that works, he also has an auspex, so that looks good too..... So using that basis, I added a servo skull, a bolter chain bayonet and the view-screen auspex off of the autocannon heavy weapon set to the top of his 'smart' bolter. Now I had the perfect leader. He looks like his men, but is a TINY bit more pimp.
So there you have it, 10 Tyrant Siege Terminators ready for basing.
Oh, and p.s. I finally have a basing scheme in mind, it utilises the basic steps from Toby's corkboard tutorial (here) combined with something of my own making (and no, it's not Wadey's tears)
So till next time,
Macca
Sunday, 1 March 2015
Basing tutorial using corkboard.
G’day folks,
Toby here again.
While I wait
for my AL to arrive in the mail, I thought I’d add my 5 cents on base creation
and do a rundown on how I make mine.
I’ll punch it out in one post so I won’t put up pics for each step just
the big ones. The base itself will be a
bit of a rocky wasteland but the same basic painting techniques can be used to
make it anything from forest to urban.
All you’ll need to change is the garnishing.
The
tutorial's divided into 3 sections, Initial Construction, Painting and Finishing
Touches.
Initial
construction of the base.
Materials
you’ll need:
- Bases
- Corkboard tiles
- Superglue
- PVA glue
- Sands of varying coarseness
1. Take the corkboard and break it up into little
pieces of different sizes, I keep only 1 side flat (the side that will be
getting glued down) and rough up all the other sides to give it a natural
appearance.
2.
Using 1 or 2 bigger bits of corkboard per base superglue them flat side
down. I’d recommend preplanning this
with the positioning of the miniature you intend on using the base on.
3. Lay down a decent coat of PVA over the rest
of the base, put a dot or 2 onto the cork so some sand sticks to it, then
sprinkle some much smaller cork pieces around on the PVA, make sure these are a
little bit bigger than the sand you’re using.
4. Now quickly move the base to your sand box
and thickly coat it, leaving it in there until the PVA dries.
Painting the
base.
Paints:
- GW White Undercoat Spray
- Rhinox Hide (GW)
- Steel Legion Drab (GW)
- Rhakarth Flesh (GW)
- Basalt Grey (Vallejo) (Same as GW Dawnstone)
- White
- Nuln Oil (GW Black ink)
And a
selection of inks:
- Athonian Camoshade
- Biel tan Green
- Seraphim Sepia
- Agrax Earthshade
1. Undercoat the base white.
2. Basecoat the cork (large stones) basalt grey
and the sand Rhinox Hide. I suggest
lightly watering down the grey and reasonably watering down the Rhinox. Because of the white base it might take
several coats but will look alot more vibrant than if you’d done a black one.
3. Heavy drybrush the sand with Steel Legion
Drab, you don’t want to obscure the Rhinox but want a good highlight to it.
4. Take all your washes apart from black and dab
them onto the grey one at a time to create a mottled effect, it will look pretty
full on at this stage but it tones down later.
Ensure you let all the washes dry before moving onto the next step.
5. Water down some black ink and wash the entire
base, sands and rocks.
6. Once the black ink is dry, drybrush the rocks
with Basalt grey so that the inks still show through but the borders of each is
blended into the whole. Then using
Rhakarth Flesh drybrush the entire base, this draws the whole base together
with a common colour.
7. Very, very lightly drybrush a few edges of
the stones with white, choose ridges and places where the light would naturally
catch.
8. Lastly paint the rim of the base in your
chosen colour.
The
finishing touches.
Materials
needed:
- Secret Weapon shell casings
- Your choice of vegetation and garnishing’s. I use MiniNatur and Gale Force 9. I’m going for a bit of a blasted wasteland look, so chose darker, drier looking grasses.
- Matte Varnish.
1. Lightly coat the bases with matte varnish.
2. Superglue a few tufts of the MiniNatur grass
on, I keep it around the base of the larger rocks so it looks like it’s growing
from beneath them.
3. Spread out some decent patches of PVA over
the sand and dip the base into your flock container.
4. Once everything's dry, or not if you’re
impatient like me, take several pre-painted shell casings (see below) and attach
them to the base with a tiny bit of superglue.
Run a little line of gold down the top edge as a highlight. As far as placement goes for them, try to
think where they’d naturally end up after being ejected, they probably won’t be
balancing on top of that rock, but might be in the cracks between the two.
The shell
casings:
2. Put all 50 of them into the bottom of base or
some other lipped container.
3. I used a watered down Vallejo Brass, loaded
my brush up with paint and roughly stirred up the casings. I did this about 3 times until they were all
coated with paint. Make sure you do
water your paint down or you’ll lose some of the detail in the rear of the
cartridges.
4. Tip them onto a piece of plasticard and separate
them all to dry. Once dry wash them all
with a black ink and they’re good to go.
Sunday, 22 February 2015
G'day
Hey all, Toby here
I'm proud to say I've been inducted
into AGIF, I’ve been a quiet follower of this blog for almost a year now so I’m
honoured to be a part of it. I’ve done a
little hobby blogging in my past and found that it helps me stay focussed and
motivated if I have a way to show others what I’ve been working on.
A quick bit of my hobby
history. I’ve been a fanatic closet
hobbyist since the 90’s when I got my first miniature, a dwarven
runepriest. True I didn’t know what to
do with it, not even that it needed to be painted, but I was hooked
nonetheless. Through the years I have in
one way or another collected almost every WFB and 40k army out there, usually
only until the next months releases come out and I realise I like them
more. I am first and foremost a hobbier
over a gamer though, so my project indecisiveness has never really bothered me
because at the end of the day it’s converting and painting that gets my rocks
off.
However…..,
I genuinely feel like a 30k army
might be my chance to finally build an army ready for the table and the xxth
are going to help me get there. Ever
since the CSM 2nd edition codex I’ve always loved the aesthetics and
idea behind the Alpha Legion, their questionable allegiances and their constantly
adapting tactics. Being a keen converter
as well I also like that their range is less than complete giving me plenty of
opportunity to freely adapt the look of my army. I plan on starting small with a 1000pt army
then slowly building it up.
Take the following list with a
grain of salt as I’ve never actually played a game, but the idea behind it is
many small elite units backed up by some rapid moving support which I think is
sticking with AL fluff.
Centurion, Consul Delegatus,
Artificer Armour, Power Weapon 100pts
7 x Vet Tactical Squad, Banestrike
shells, Plasma gun 190pts
7 x Vet Tactical Squad, Banestrike
shells, Plasma gun 190pts
Contemptor, Kheres Assault Cannon 190pts
5x Headhunter, Prime, Banestrike
shells, Heavy Bolter, Rhino 240pts
Javelin Attack Speeder 75pts
That comes to 985pts and seems like
a pretty standard list. However I’m open
to suggestions on how to improve it.
I’ve got a few orders incoming so I
should be starting on the bulk of the modelling in the coming weeks. I have an order though Forgeworld (shoulder
pads and rhino doors), faux Forgeworld (the bulk of the above list), Combat
company (some Alpha Legion specific paints) and Anvil industry (pouches and
weapon mods).
Due to a generous donation however
I do have several sets of Mk VI armour which I’ve started to modify a little to
better suit my vision.
On that note my biggest gripe with
space marines is their somewhat warped body proportions, for 7 foot super
soldiers they are remarkably short. So
the first mod I’ll be doing is adding a little extra height and proportion to
the legs, not too much, just enough to put the Alpha back in Alpha Legion.
Step 1: Remove both legs from the hip carefully, cut
inbetween the upper leg and the ribbed under-armour (there’s only one leg
because at the time I couldn’t find the other one)
Step 2: Sand/smooth down the top of the leg where you
cut it, it’s important to get this as flat as possible so it sits flush with
the plasticard in the next step.
Step 3: Take some small squares of plasticard and
glue them to the top of the leg, I used 2mm but 1mm would work just as well, 3mm
might even be ok.
Step 4: With the hip section, flatten out the top and
put another bit of plasticard on top this extends the torso a little above the
hips and adds that little bit more height.
Step 5: This is where it gets fiddly. Shave off the excess plasticard so it’s
shaped with the contours of the leg and hip armour then sand and smooth it down
so it’s nice and rounded. If you sat the
plasticard flush on top of the leg you will barely see the join between the
two. And even if you do it looks like another
groove in the armour, so it’s ok. The
hip tops not quite as important to get smooth because it will be hidden in the
torso.
Step 6: You don’t have to but just to add a little
more structural integrity I pinned the legs back onto the hips, it also gives a
bit more freedom when posing the legs.
Step 7: And lastly I took a little yellow grey putty
and filled in some small gaps between the joins. Every different putty type has its merits and
yellow milliput is great for small gap filling, it has an interesting grainy
consistency and smooths out really well with a bit of water.
As you can see the simple mod adds
a little extra height and makes the upper leg a bit more realistically proportioned. It’ll also help them to tower over the lesser
legions out there.
Well that's all from me for now, back to chopping up little bits of resin. I'll be back when my packages arrive.
Cheers,
Toby
Thursday, 19 February 2015
2000pts Sons of Horus - Playtest and Tweak
Horus. The original army list can be found here.
So I had my good mates Buzz and the Dice Wizard himself Braden (from the Dicewizard blog) come over for a friendly playtest game on the Istvaan III board (which is still a WIP.... why do I have so many half finished projects?!) and play test my SoH list as well as give Buzz's Dark Angels list a run.
Buzz's list went something like this:
+++ 2000pts Dark Angels (using Stubborn) +++
HQ
145pts Legion Chaplin w/ Artificer Armour, Jump Pack, Power Fist, Refractor Field
145pts Primus Medicae w/ Jetbike, Meltabombs, Refractor Field
Elites
65pts Apothecarian Detachment (x1) w/ Artificer Armour, Power Weapon
Troops
380pts Legion Assault Squad (x9) w/ Combat Shields, Meltabombs, 2x Power Weapons, Sgt w/ Artificer Armour, Pair of Lightning Claws
240pts Legion Tactical Squad (x14) w/ Close Combat Weapons, Sgt w/ Artificer Armour
Fast Attack
170pts Legion Javelin Attack Speeder Squadron (x2) w/ 2x Cyclone Missile Launchers, 2x Mulitmeltas
300pts Legion Jetbike Sky Hunter Squadron (x6) w/ 2x Plasma Cannons, Meltabombs
270pts Legion Storm Eagle Assault Gunship w/ 2x Twin Linked Lascannons, Twin Linked Heavy Bolter
Heavy Support
135pts Legion Sicaran Battle Tank
150pts Legion Vindicator w/ Combi-Bolter, Machine Spirit
+++ End List +++
Modus Operandi: The Chaplin would attach to the Assault Squad to make them Fearless and also give them hatred. They would look for targets of opportunity or go tank hunting with Meltabombs. The Medicae Primus would attach to the Jetbike Skyhunters, giving an already tough unit FNP. The Tactical Squad loads up into the Storm Eagle and provides aerial fire support as well as a scoring unit which can be used for last minute objective grabbing. The Land Speeder would outflank, and put some hurt on the rear armour of tanks or use Frag Missiles to hit squads. The Vindicator could move 12" and still shoot it's Demolisher Cannon thanks to Machine Spirit, giving it a heap of range, and the Sicaran was there for all round dakka / AA duty.
As you can see the Dark Angels are very mobile, and can put out a fair bit of dakka whilst still being choppy. It wasn't until I put out all my models that I realised that the SoH list was missing something, I couldn't put my finger on it but it just looked light on the ground. I won't go into a full battle report, but the key points / events were:
- The Sicaran and Venator are nearly permanent choices in a conventional 30k list. The Venator popped most of the armour and the Sicaran drew a heap of fire, and also denied the Javelins jink saves which brought about their end. In saying that, Buzz rolled badly whilst trying to outflank them, and they turned up auto on Turn 4. Then he rolled up the outflank side with no one on it. Le sigh.
- The Seeker's Dreadclaw scattered onto terrain and went into ongoing reserves. They showed up on Turn 2 gunning for the Jetbikes who were Deathmarked, but they were locked in combat with one of my Tactical squads... so they intercepted the DA Assault Squad instead, killing all bar three and the Chaplin. There were no other targets available so they held an objective, the Dreadclaw went flying off to either flame units or act as an area denial piece for the Storm Eagle.
- The DA charged their Jetbikes into the first Tactical Squad which was holding an objective, the Medicae Primus and the Tac Sgt ended up in a dual for four turns and could not kill each other (many lols and angry shouting at dice). This left both squads tar pitted until it turned into a massive battle royale with both the remains of the DA Assault squad and the full strength second SoH Tactical squad charged in! It was pretty funny to watch and play with this mass of 50 or so bodies fighting around an objective.
- The SoH Landraider really didn't achieve anything and the cheap version I purchased didn't have the assault rule. So instead of saving me points for other things, my counter charge unit could not counter charge, making the command squad kind of redundant as they could not reach any combats without being shot to pieces first.
So that was a general summary of what happened.
SoH managed to get a win, but it was neck and neck until the bottom of Turn 5. It would have been a different game if those speeders came on. GG Buzz! Mucho fun. From the game I learnt a few things about my list and some glaring faults
with it. After the game Buzz, Braden and myself sat around for a while
and discussed a few options with how to improve the list. Some
observations and changes were:- The Command Squad in a Proteus Landraider is a very ineffective way to run them. Not only could they not assault out of the vehicle, but the 7th Ed FAQ also means that the Legion Standard does not effect models outside the vehicle like it used to. They need to be dismounted for others to benefit from the 6" Fearless bubble. The fix? It worked out for the command squad to ditch the Landraider and take Jetbikes was 25pts cheaper. Easy fix! This left a big points gap for the Praetor who had to upgrade to have a Jetbike, and while I was at it added a Powerfist. I will discuss where the points came from shortly, but the reason for the Powerfist is so that with a Paragon Blade, you have two specialist weapons and gain an extra attack, as well as a good anti-tank option for mulit-hits, unlike the single shot Meltabomb.
- Legion Tactical Squads at full strength of twenty are rather unwieldy. They can put down a heap of fire and have excellent overwatch capability but it is not very often you have all twenty in rapid fire range or LoS of your target for maximum effectiveness for Fury of the Legion. The good thing was that if you took a few casualties, it was hardly noticed from damage output. Rather than keep the big squads, each one got cut by five men freeing up 100pts to use elsewhere (see Command Squad above).
- Legion Seekers did well but once the spent their combi-weapons they ran out of punch. It was nice to have BS 5 and preferred enemy on a chosen unit, but as soon as that target is unavailable or destroyed then they really don't have a job that they can do effectively. These are going to be replaced with a 9 man Legion Tactical Support Squad with Plasmaguns, mounted in a separate fast attack choice Dreadclaw. No BS 5 or Deathmark rule, but you can fire them all day until your hands melt off (which will no doubt happen on numerous occasions).
- Apothecaries were solid. They saved about 50% of the casualties that would have been thanks to some good rolls and really kept the Tactical Squads in the fight. With the Command Squad going to Jetbikes, it will cost too much for a Medicae Primus to attach to them, to do so would cost me a unit or vehicle which I am not prepared to drop at this stage. I also dropped two of the Augury Scanners from the the two Apothecaries that will be supporting the Tactical Squads. They are nice to have but they really didn't get used. Most things that turn up on Deepstrike / Outflank are vehicles, and bolters can only do so much. I kept the one for the Seekers / Support Squad as they may actually do some damage to tanks / terminators / flyers, unlike bolt guns. Apothecaries were also upgraded to have Artificer Armour to give a bit more protection.
- Vehicles were solid. The only upgrades that would be good would be Dozer Blades and Armoured Ceremite, but with only 5pts left to spare the Sicaran got a Dozer Blade to enhance maneuvering.
Implementing these into the new list, it looks a little something like this:
+++ 2000pts Sons of Horus +++
HQ
215pts Praetor w/ Iron Halo, Paragon Blade, Powerfist, Jetbike
395ptspts Legion Command Squad (x5) w/ Jetbikes, 5x Combat Shields, 4x Power Weapons, Power Fist
Elites
170pts Apothecarion Detachment w/ 3x Apothecaries, 3x Artificer Armour, 1x Augury Scanner
Troops
240pts Legion Tactical Squad (x15) w/ Legion Vexilla, Sgt w/ Artificer Armour, Powerfist, Meltabombs
310pts Legion Tactical Support Squad (x9) w/ Plasmaguns, Sgt w/ Artificer Armour, Meltabombs
Fast Attack
100pts Dreadclaw Drop Pod
Heavy
190pts Sicaran Venator Tank Destroyer
140pts Legion Sicaran Battle Tank, Dozer Blade
+++ End List +++
I am pretty happy with the tweaks, the Jetbikes for the Command Squad will make them much more self supporting, speedy and most of all useful rather than a points sink that doesnt get used. Tac squads are a bit easier to use but still have a pile of wounds, and the bulk plasma in the Tactical Support squad should be enough to hurt nearly anyone.
So... What do you think about the changes? I would love some feedback guys.
Till next time
Keepy
Monday, 16 February 2015
Iron Havok Squad 1
I know what you're all thinking: Three posts in three days from that asshole Macca. He was too busy to put anything up for a month, now he gives us 3 posts in 3 days. Yes, I'm as bad as BOLS for click-baiting sometimes.
But hey, at least I show what I promise?
So, what did I promise today? Converted Iron Havoks, that's what! Iron Within, Iron Without Brothers and Sisters.
The squad leader has all the kit, including servo skulls. Mechanicum bitches love servo skulls.
The shoulder marking is a nice simple one. Also note the pattern I applied to the drum mag on the heavy bolter, and on top of his helm in the next picture.
I have chosen to have very few minis in this army unhelmed so far. This is one of them, because I love this sculpt, it's perfectly detailed.
Believe it or not, this is the only member of the squad with some hazard stripe markings. I chose to keep them really tones down here, as the Iron Hands kit these minis are based on already has quite a lot of bling.
So there you have it. In game, this loadout is a bit meh. Their weapons cause cover saves taken against them to be at -1, however they also lose a point of ap for using shrapnel (pinning) rounds, making them kind redundant in this role. On the plus side, the unit has tank hunters, so against units like rhinos and skimmers, these guys may just pull off some kills.
Why might I use this unit if I am not a fan of them weapon-wise? Because I don't care. The rule of cool trumps tactical usability any day haha.
(For those who are curious, the bases are quite plain at the moment. Well, that's because this army is making the move to 32mm shortly)
Thanks for checking them out,
~Macca
Subscribe to:
Posts (Atom)